Android开发中基础动画技巧的应用
一、引言
我是先入门iOS的移动开发者,提到动画开发,iOS开发者很容易联想到3种方式,UIImageView的帧动画,UIView层的属性动画和CoreAnimation动画。Android中也有3种方式创建基础动画效果,分别为View Animation,Property Animation和Drawable Animation。由于Android开发的固有特点,其在进行动画编程时也支持使用代码和xml配置文件两种方式。本篇博客,将主要向大家介绍这3种创建Android动画方式的使用方法与可以做到的效果。
二、View Animation动画的应用
View Animation又被称为Tweened Animation,其应用于View视图变化的动画过渡效果。View Animation主要分为如下4类:
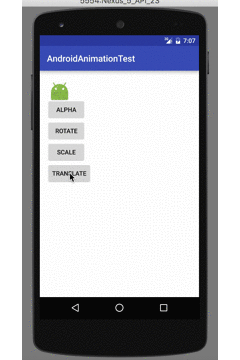
①.AlphaAnimation:透明度动画
②.RotateAnimation:旋转动画
③.ScaleAnimation:缩放动画
④.TranslateAnimation:位移动画
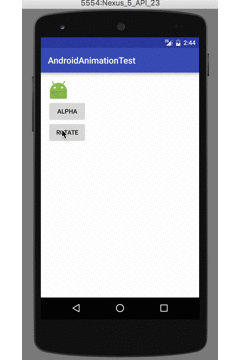
1.AlphaAnimation的应用
AlphaAnimation用于当视图透明度发生变化时展示过渡动画,可以渐隐也可以渐现。使用AlphaAnimation创建动画的核心代码如下:
1
2
3
4
5
6
|
AlphaAnimation alphaAnimation = new AlphaAnimation(1,0);
alphaAnimation.setDuration(3000);
animationImageView.startAnimation(alphaAnimation);
|

2.RotateAnimation的应用
RotateAnimation用于创建视图的旋转动画。其相比AlphaAnimation要复杂一些,在使用时,除了需要设置其动画的起始角度和最终角度外,还可以设置视图旋转时的参照位置,示例代码如下:
1
2
3
4
5
6
|
RotateAnimation rotateAnimation = new RotateAnimation(0,360, Animation.RELATIVE_TO_SELF,0.5f,Animation.RELATIVE_TO_SELF,0.5f);
rotateAnimation.setDuration(3000);
animationImageView.startAnimation(rotateAnimation);
|
这里使用了RotateAnimation类中最复杂的一个构造方法,其中需要传入6个参数,前两个参数分别为旋转动画的起始角度与终止角度,第3个参数为旋转参照点的x轴相对位置类型,第4个参数为参照点x轴位置,第5个和第6个参数分别为旋转参照点的y轴相对位置类型与y轴相对位置。
关于参照点的相对位置类型,Animation类中定义了几个常量供开发者选择使用,意义如下:
1
2
3
4
5
6
|
public static final int ABSOLUTE = 0;
public static final int RELATIVE_TO_PARENT = 2;
public static final int RELATIVE_TO_SELF = 1;
|
还有一点需要注意,如果选择的参照类型是RELATIVE_TO_SELF,则参照点的位置参数取值范围为0-1之间,代表的是相对于自身的位置比例,如果参照类型是RELATIVE_TO_PARENT,则参照点的位置参数取值范围为0-1之间,代表的是相对于父视图的位置比例,如果参照类型是ABSOLUTE,则参照点的位置参数取值为绝对坐标值,例如100,150,其代表了相对窗口视图的坐标位置。例如上面示例代码中,以视图本身为参照物,x、y轴位置都设置为0.5,则旋转动画以视图本身中心为旋转点,如果需要以视图右下角为旋转点,修改代码如下:
1
| RotateAnimation rotateAnimation = new RotateAnimation(0,360, Animation.RELATIVE_TO_SELF,1f,Animation.RELATIVE_TO_SELF,1f);
|
3.ScaleAnimation的应用
ScaleAnimation用于创建放大或者缩小的形变动画,示例代码如下:
1
2
3
4
5
6
|
ScaleAnimation scaleAnimation = new ScaleAnimation(1,2,1,2,Animation.RELATIVE_TO_SELF,0.5f,Animation.RELATIVE_TO_SELF,0.5f);
scaleAnimation.setDuration(3000);
animationImageView.startAnimation(scaleAnimation);
|
上面示例代码中前4个参数分别设置缩放动画x轴方向的起始值、最终值和y轴方向的起始值、终止值。需要注意,这里的单位都是比例,1表示原视图尺寸,2表示原视图尺寸的2倍。这个方法后4个参数的意义是确定缩放参照点的位置,和RotateAniamtion构造方法中的参数意义一致。

4.TranslateAnimation的应用
TranslateAnimation用于创建位移动画,示例代码如下:
1
2
3
4
5
6
|
TranslateAnimation translateAnimation = new TranslateAnimation(Animation.ABSOLUTE,0,Animation.ABSOLUTE,100,Animation.RELATIVE_TO_SELF,0,Animation.RELATIVE_TO_SELF,1);
translateAnimation.setDuration(3000);
animationImageView.startAnimation(translateAnimation);
|
上面示例代码中使用的TranslateAnimation构造方法中的8个参数分别代表,起始位置的x轴参照点类型与起始位置的x轴值、终止位置的x轴参照点类型与终止位置的x轴值、起始位置的y轴参照点类型与起始位置的y轴值、终止位置的y轴参照点类型与终止位置的y轴值。
5.Animation类中的通用方法
上面介绍的4种动画实际上都是Animation类的子类,Animation类中封装了许多动画通用的方法,例如前面使用的设置动画执行时间的方法setDuration就是Animation类的方法,其中更多常用方法列举如下:
1
2
3
4
5
6
7
8
9
10
11
12
13
14
15
16
17
18
19
20
21
22
23
24
25
26
27
28
29
30
31
32
33
34
35
36
37
38
39
40
41
42
43
|
public void cancel();
public void setInterpolator(Interpolator i);
public void setStartOffset(long startOffset);
public void setDuration(long durationMillis);
public void restrictDuration(long durationMillis);
public void scaleCurrentDuration(float scale);
public void setStartTime(long startTimeMillis);
public void setRepeatMode(int repeatMode);
public void setRepeatCount(int repeatCount);
public void setFillEnabled(boolean fillEnabled);
public void setFillBefore(boolean fillBefore);
public void setFillAfter(boolean fillAfter)
public void setZAdjustment(int zAdjustment);
public void setDetachWallpaper(boolean detachWallpaper);
public boolean hasStarted();
public boolean hasEnded();
|
上面列举的方法中,setInterpolator()方法很有意思,其可以设置动画执行的时间函数,例如是先快后慢还是先慢后快等等,这个方法需要传入一个Interpolator类型的参数,实际上使用时是通过Interpolator的子类来实现的,示例如下:
1
| ranslateAnimation.setInterpolator(new AccelerateDecelerateInterpolator());
|
对于Interpolator参数开发者可以设置的子类及意义列举如下:
AccelerateDecelerateInterpolator:先加速后减速执行
AccelerateInterpolator:加速执行
AnticipateInterpolator:先后退执行一步后正向加速执行(类似弹簧效果)

AnticipateOvershootInterpolator:先后退执行一步后加速执行到达极限后再前进一步后再回到极限(弹簧)

BounceInterpolator:动画执行到结尾后进行阻尼效果
CycleInterpolator:以正弦规则循环执行数次动画,这个类来构造时需要传入循环次数,如下:
1
| new CycleInterpolator(3)
|
DecelerateInterpolator:减速执行动画
FastOutLinearInInterpolator:基于贝塞尔曲线的速率变化
FastOutSlowInInterpolator:基于贝塞尔曲线的速率变化
LinearInterpolator:线性匀速执行
LinearOutSlowInInterpolator:基于贝塞尔曲线的速率变化
OvershootInterpolator:执行超出极限后在回退

PathInterpolator:自定义运动路径
6.实现对Animation动画状态的监听
Animation类中也定义了一个监听器协议,其中提供了对动画状态进行监听的方法,如下:
1
2
3
4
5
6
7
8
| public interface AnimationListener {
void onAnimationStart(Animation var1);
void onAnimationEnd(Animation var1);
void onAnimationRepeat(Animation var1);
}
|
7.使用xml文件配置View Animation
上面介绍的全部是通过代码来创建View Animation动画,Android也支持使用xml文件来配置View Animation动画。
首先在Android Studio的res目录中创建一个动画文件目录,将其类型选择为anim,如下图所示:

在创建的目录中创建一个新的xml文件,在其中编写动画代码如下:
1
2
3
4
| <?xml version="1.0" encoding="utf-8"?>
<set xmlns:android="http://schemas.android.com/apk/res/android">
<alpha android:fromAlpha="1" android:toAlpha="0" android:duration = "3000"/>
</set>
|
在代码中,使用如下代码来加载xml配置的动画:
1
2
3
4
|
Animation animation = AnimationUtils.loadAnimation(this,R.anim.my_anmi);
animationImageView.startAnimation(animation);
|
8.复合的View Animation
View Animation也支持进行复合动画的操作,如果使用xml配置复合动画,十分简单,只需要将要要复合的动画都配置进xml文件的set标签中即可,如下:
1
2
3
4
5
| <?xml version="1.0" encoding="utf-8"?>
<set xmlns:android="http://schemas.android.com/apk/res/android">
<alpha android:fromAlpha="1" android:toAlpha="0" android:duration = "3000"/>
<scale android:fromXScale="1" android:toXScale="2" android:fromYScale="1" android:toYScale="2" android:duration="3000"/>
</set>
|

如果要用代码创建复合动画,需要使用到AnimationSet类进行复合,示例如下:
1
2
3
4
5
6
7
8
9
10
11
12
|
AnimationSet set = new AnimationSet(true);
RotateAnimation rotateAnimation = new RotateAnimation(0,360, Animation.RELATIVE_TO_SELF,1f,Animation.RELATIVE_TO_SELF,1f);
ScaleAnimation scaleAnimation = new ScaleAnimation(1,2,1,2,Animation.RELATIVE_TO_SELF,0.5f,Animation.RELATIVE_TO_SELF,0.5f);
scaleAnimation.setDuration(3000);
rotateAnimation.setDuration(3000);
set.addAnimation(rotateAnimation);
set.addAnimation(scaleAnimation);
animationImageView.startAnimation(set);
|
三、Property Animation动画的应用
在前面介绍的View Animation动画体系中,虽然使用起来十分方便,但也有十分多的局限性,例如只能支持透明度,位置,缩放和旋转动画,并且在动画执行时,视图实际上并没有移动,如果需要做动画的是可以用户交互的按钮控件则会带来很多的不便。在Android3.0之后,系统推出了Property Animation动画,这种机制可以将对象任意属性的修改实现过渡动画效果。
1.ObjectAnimator动画的应用
ObjectAnimator是Property Animation动画体系中最简单易用的一种方式,开发者只需要设置要改变的属性值和一些动画参数即可使用,例如若要实现视图以y方向为轴进行旋转操作,使用 如下代码实现:
1
2
3
4
5
6
|
ObjectAnimator objectAnimator = ObjectAnimator.ofFloat(animationImageView,"rotationY",0,360,0);
objectAnimator.setDuration(3000);
objectAnimator.start();
|
ObjectAnimator类的静态方法ofFloat()用于创建属性动画实例本身,与其类似的方法还有ofInt()与ofObject()。需要注意,这些方法第1个参数为要执行动画的视图,第2个参数为要发生动画改变的属性名,从第3个参数开始后面可以添加任意多个值,这些值代表了属性值改变的路径,例如上面示例代码表示将视图以y方向为轴从0°开始旋转到360°后再旋转回0°。

ObjectAnimator类继承自ValueAnimator,ValueAnimator类则更加灵活自由,其可以为自定义类的自定义属性做动画处理,后面会介绍,ValueAnimator类中提供了许多动画配置的方法,常用如下:
1
2
3
4
5
6
7
8
9
10
11
12
13
14
15
16
17
18
19
20
|
public ValueAnimator setDuration(long duration);
public void setStartDelay(long startDelay);
public void setRepeatCount(int value);
public void setRepeatMode(int value);
public void setInterpolator(TimeInterpolator value);
public void start();
public void end();
public void cancel();
public void resume();
public void pause();
|
需要注意,使用ObjectAnimator创建动画的属性必须实现set和get方法。
2.ValueAnimator实现更加灵活的自定义动画
ObjectAnimator是ValueAnimator的子类,可以理解,ValueAnimator要比ObjectAnimator更加灵活自由,其可以实现任意自定义属性的动画行为。示例代码如下:
1
2
3
4
5
6
7
8
9
10
11
12
13
14
15
16
17
|
ValueAnimator valueAnimator = new ValueAnimator();
valueAnimator.setFloatValues(0,200,100,300,0);
valueAnimator.setDuration(6000);
valueAnimator.addUpdateListener(new ValueAnimator.AnimatorUpdateListener() {
@Override
public void onAnimationUpdate(ValueAnimator valueAnimator) {
animationImageView.setX((Float) valueAnimator.getAnimatedValue());
}
});
valueAnimator.start();
|
如果运行上面代码,可以看到视图在6s内从x坐标点为0的地方平移到200后再次回到100后再次移动到300最终回到原点0。
上面的示例代码只是演示了ValueAnimator的工作原理,开发者可以在onAnimationUpdate()方法中进行任意属性的修改。仅从上面演示代码并不能体现出ValueAnimator的强大之处,可以通过实现类似抛物线的动画来理解ValueAnimator的灵活之处,示例代码如下:
1
2
3
4
5
6
7
8
9
10
11
12
13
14
15
16
17
18
19
20
21
22
23
24
25
26
27
28
29
30
31
|
final ValueAnimator animator = new ValueAnimator();
animator.setObjectValues(new Point(0,0),new Point(400,0));
animator.setDuration(4000);
animator.setInterpolator(new LinearInterpolator());
animator.setEvaluator(new TypeEvaluator<Point>() {
@Override
public Point evaluate(float v, Point o,Point t1) {
Point point = new Point();
point.x = (int)((v*8)*100);
point.y = (int)((v*60)*(v*60)/4);
return point;
}
});
animator.addUpdateListener(new ValueAnimator.AnimatorUpdateListener() {
@Override
public void onAnimationUpdate(ValueAnimator valueAnimator) {
animationImageView.setX(((Point)valueAnimator.getAnimatedValue()).x);
animationImageView.setY(((Point)valueAnimator.getAnimatedValue()).y);
}
});
animator.start();
|

需要注意,Property Animation与View Animation最大的不同在于View Animation只是展示视图的界面动画,它并没有真正改变视图的属性,而Property Animation是实实在在的改变了发生动画控件的属性。
3.Property Animation动画的监听
ValueAnimator对象可以使用addListener()方法来添加监听者,接口方法如下:
1
2
3
4
5
6
7
8
9
10
11
|
public interface AnimatorListener {
void onAnimationStart(Animator var1);
void onAnimationEnd(Animator var1);
void onAnimationCancel(Animator var1);
void onAnimationRepeat(Animator var1);
}
|
4.使用PropertyValuesHolder进行动画复合
对于Property Animation,开发者可以通过ValueAnimator实现自定义的复合动画,也可以使用PropertyValuesHolder进行属性动画的复合操作,示例如下:
1
2
3
4
5
6
7
8
9
|
PropertyValuesHolder holder = PropertyValuesHolder.ofFloat("rotationY",0,360,90);
PropertyValuesHolder holder2 = PropertyValuesHolder.ofFloat("alpha",1,0,1);
ObjectAnimator objectAnimation = ObjectAnimator.ofPropertyValuesHolder(animationImageView,holder,holder2);
objectAnimation.setDuration(3000);
objectAnimation.start();
|

三、Drawable Animation动画的应用
相比前两种动画模式,Drawable Animation动画要容易的多,其使用一组图像快速切换的原理来实现动画效果。
在Android Studio的drawable文件夹中添加一个animation文件,xml代码如下:
1
2
3
4
5
6
7
8
9
10
11
| <?xml version="1.0" encoding="utf-8"?>
<animation-list xmlns:android="http://schemas.android.com/apk/res/android">
<item android:drawable="@drawable/bird1" android:duration="200" />
<item android:drawable="@drawable/bird2" android:duration="200" />
<item android:drawable="@drawable/bird3" android:duration="200" />
<item android:drawable="@drawable/bird4" android:duration="200" />
<item android:drawable="@drawable/bird5" android:duration="200" />
<item android:drawable="@drawable/bird6" android:duration="200" />
<item android:drawable="@drawable/bird7" android:duration="200" />
<item android:drawable="@drawable/bird8" android:duration="200" />
</animation-list>
|
将需要展示动画的视图背景设置为这个drawable文件,示例如下:
1
2
3
4
5
| <ImageView
android:layout_width="wrap_content"
android:layout_height="wrap_content"
android:background="@drawable/anmi_draw_list"
android:id="@+id/animatedImageView"/>
|
在需要开始动画时,调用如下代码即可:
1
2
|
((AnimationDrawable)animationImageView.getBackground()).start();
|

专注技术,热爱生活,交流技术,也做朋友。
——珲少 QQ群:435043639