logo头像

学如逆水行舟

iOS开发CoreGraphics核心图形框架之六——梯度渐变

iOS开发CoreGraphics核心图形框架之六——梯度渐变

一、引言

关于颜色梯度渐变视图的创建,CoreGraphics框架中提供了两个类型CGShadingRef与CGGradientRef。CoreGraphics框架在绘制梯度渐变时,有两种绘制方式,分别为轴向绘制与径向绘制。轴向绘制是指确定两个点,起点与终点连接的直线作为梯度渐变的轴,垂直于此轴的线共享相同的颜色,由起点向终点进行颜色渐变。径向渐变是指由两个圆连接成圆台,在同一圆周上的所有点共享相同的颜色,由起始圆向终点圆进行颜色渐变。

轴向渐变:

径向渐变:

前面说到,CGShadingRef与CGGradientRef都可以用于创建梯度渐变视图,这两个类型在使用使又有一些不同,CGShadingRef在使用使需要开发者为其提供一个颜色计算方法,CGGradientRef则不需要,相比之下,CGGradientRef更像是为了方便开发者使用而从CGShadingRef中扩展出的一个类型。

二、使用CGGradientRef创建梯度渐变视图

创建一个UIView子类,在其drawRect:方法中编写如下测试代码:
1
2
3
4
5
6
7
8
9
10
11
12
13
14
15
-(void)drawRect:(CGRect)rect{
CGGradientRef gradientRef;
CGColorSpaceRef colorSpaceRef;
CGFloat locs[2] = {0,1};
CGFloat colors[8] = { 1.0, 0, 0, 1.0, // 前4个为起始颜色的rgba
0, 1, 0, 1.0 }; // 后4个为结束颜色的rgba
colorSpaceRef = CGColorSpaceCreateWithName(kCGColorSpaceGenericRGB);
gradientRef = CGGradientCreateWithColorComponents (colorSpaceRef, colors,
locs, 2);
CGContextRef contextRef = UIGraphicsGetCurrentContext();
//这个方法用于创建轴向渐变
// CGContextDrawLinearGradient(contextRef, gradientRef, rect.origin, CGPointMake(rect.origin.x+rect.size.width, rect.origin.y+rect.size.height), 0);
//这个方法用于创建径向渐变
CGContextDrawRadialGradient(contextRef, gradientRef, CGPointMake(rect.origin.x+rect.size.width/2, rect.origin.y+rect.size.height/2), rect.size.width/2, CGPointMake(rect.origin.x+rect.size.width/2, rect.origin.y+rect.size.height/2), rect.size.width/4, 0);
}

CGContextDrawRadiaGradient()方法中的参数解析如下:

1
2
3
4
5
6
7
8
9
10
11
12
13
14
15
16
17
/*
c:绘图上下文
gradieent:渐变对象
startCenter:渐变起始圆心
startRadius:渐变起始圆半径
endCenter:渐变终止圆心
endRadius:渐变终止圆半径
options:渐变的填充风格 设置为0则不进行填充
typedef CF_OPTIONS (uint32_t, CGGradientDrawingOptions) {
kCGGradientDrawsBeforeStartLocation = (1 << 0), //起点以前也进行填充
kCGGradientDrawsAfterEndLocation = (1 << 1) //终点之后也进行填充
};
*/
CG_EXTERN void CGContextDrawRadialGradient(CGContextRef cg_nullable c,
CGGradientRef cg_nullable gradient, CGPoint startCenter, CGFloat startRadius,
CGPoint endCenter, CGFloat endRadius, CGGradientDrawingOptions options)
CG_AVAILABLE_STARTING(__MAC_10_5, __IPHONE_2_0);

CGGradient中定义的方法解析如下:

1
2
3
4
5
6
7
8
9
10
11
12
13
14
15
16
17
18
19
20
21
22
23
24
25
26
//获取CGGradient类在CoreGraphics框架中的id
CFTypeID CGGradientGetTypeID(void);
//创建CGGradientRef
/*
space:色彩空间
components:色值数组
locations:渐变临界点
count:locations数组中元素个数
*/
CGGradientRef __nullable CGGradientCreateWithColorComponents(
CGColorSpaceRef cg_nullable space, const CGFloat * cg_nullable components,
const CGFloat * __nullable locations, size_t count);
//创建CGGradientRef 这个方法locations中的元素个数需要与colors中的对应
/*
space:色彩空间
colors:颜色数组
locations:渐变临界点
*/
CGGradientRef __nullable CGGradientCreateWithColors(
CGColorSpaceRef __nullable space, CFArrayRef cg_nullable colors,
const CGFloat * __nullable locations);
//进行引用计数+1
CGGradientRef cg_nullable CGGradientRetain(
CGGradientRef cg_nullable gradient);
//进行引用计数-1
void CGGradientRelease(CGGradientRef cg_nullable gradient);

三、CGShadingRef的应用

CGShadingRef的使用就不像CGGradientRef那么方便,其中方法解析如下:
1
2
3
4
5
6
7
8
9
10
11
12
13
14
15
16
17
18
19
20
21
22
23
//获取CGShadingRef在CoreGraphics框架中的id
CFTypeID CGShadingGetTypeID(void);
//创建轴向渐变的CGShadingRef对象
/*
space:色彩空间
start:起始点
end:结束点
function:颜色计算函数
extendStart:是否填充起始点以前
extendEnd:是否填充结束点之后
*/
CGShadingRef __nullable CGShadingCreateAxial(
CGColorSpaceRef cg_nullable space, CGPoint start, CGPoint end,
CGFunctionRef cg_nullable function, bool extendStart, bool extendEnd);
//创建径向渐变的CGShadingRef对象 参数同上
CGShadingRef __nullable CGShadingCreateRadial(
CGColorSpaceRef cg_nullable space,
CGPoint start, CGFloat startRadius, CGPoint end, CGFloat endRadius,
CGFunctionRef cg_nullable function, bool extendStart, bool extendEnd);
//引用计数+1
CGShadingRef cg_nullable CGShadingRetain(CGShadingRef cg_nullable shading);
//引用计数-1
void CGShadingRelease(CGShadingRef cg_nullable shading);

示例代码如下:

1
2
3
4
5
6
7
8
9
10
11
12
13
14
15
16
17
18
19
20
21
22
23
24
25
26
27
28
29
30
31
32
33
34
35
36
37
38
39
40
41
42
43
44
45
46
47
48
49
50
51
52
53
54
55
56
57
58
59
60
61
62
63
64
65
66
67
68
69
70
71
72
//颜色计算函数
/*
info 是开发者后面将传入的色彩空间的参数个数
in 为输入参数 对应0-1之间
out 为输出参数 为所对应颜色空间的每个色值
*/
static void myCalculateShadingValues (void *info,
const CGFloat *in,
CGFloat *out)
{
size_t k, components;
double frequency[4] = { 55, 220, 110, 0 };
//获取色彩空间的色值数
components = (size_t)info;
for (k = 0; k < components - 1; k++)
//*out++ 的作用是指针右移 out指针可以理解为数组 右移作用和数组赋值一致
*out++ = (1 + sin(*in * frequency[k]))/2;
//最后追加上透明度值
*out++ = 1; // alpha
}

-(void)drawRect:(CGRect)rect{
size_t numComponents;
//输入参数的范围 其中元素个数是 输入参数个数的两倍
static const CGFloat input_value_range [2] = { 0, 1 };
//输出参数的范围 其中元素个数是 输出参数个数的两倍
static const CGFloat output_value_ranges [8] = { 0, 1, 0, 1, 0, 1, 0, 1 };
//组合回调函数
static const CGFunctionCallbacks callbacks = { 0,
&myCalculateShadingValues,
NULL };
//获取色彩空间的色值数
numComponents = 1 + CGColorSpaceGetNumberOfComponents (CGColorSpaceCreateWithName(kCGColorSpaceGenericRGB));
//创建CGFunctionRef
CGFunctionRef func = CGFunctionCreate ((void *) numComponents,
1,
input_value_range,
numComponents,
output_value_ranges,
&callbacks);


CGPoint startPoint, endPoint;
CGFloat startRadius, endRadius;
CGAffineTransform myTransform;
//起始圆位置
startPoint = CGPointMake(0.25,0.3);
//半径
startRadius = .1;
//终止圆位置
endPoint = CGPointMake(.7,0.7);
//半径
endRadius = .25;
//创建CGShadingRef
CGShadingRef myShading = CGShadingCreateRadial (CGColorSpaceCreateWithName(kCGColorSpaceGenericRGB),
startPoint,
startRadius,
endPoint,
endRadius,
func,
false,
false);
CGContextRef context = UIGraphicsGetCurrentContext();
//进行transform的映射
myTransform = CGAffineTransformMakeScale(320, 568);
CGContextConcatCTM(context, myTransform);
CGContextSaveGState(context);
//进行绘制
CGContextDrawShading(context, myShading);


}

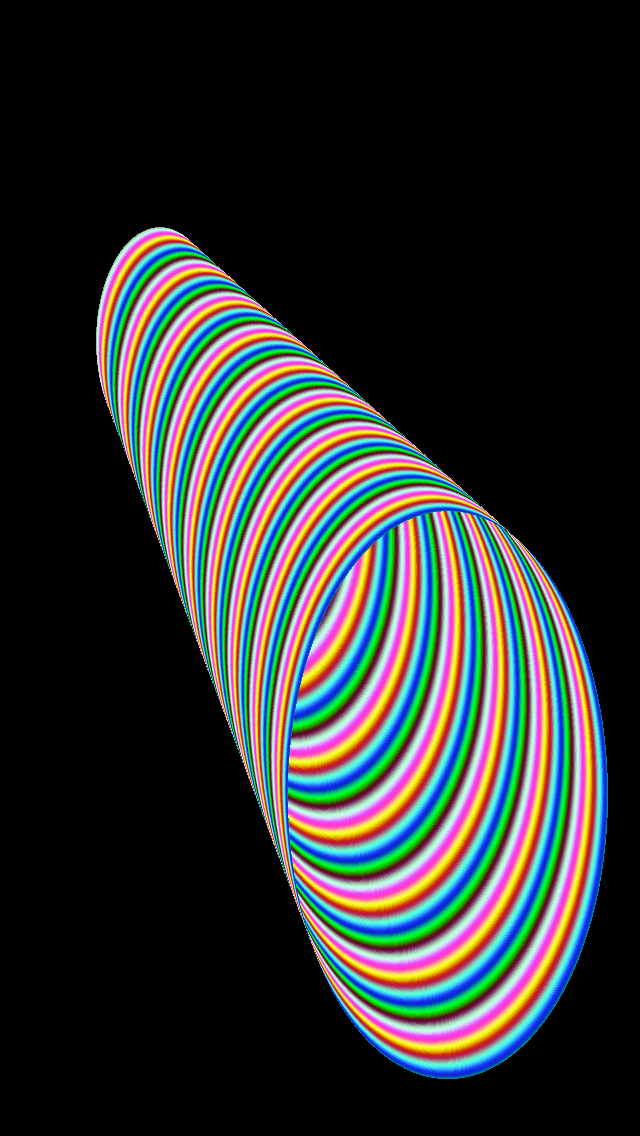
上面的示例代码效果如下图:

四、一些小技巧

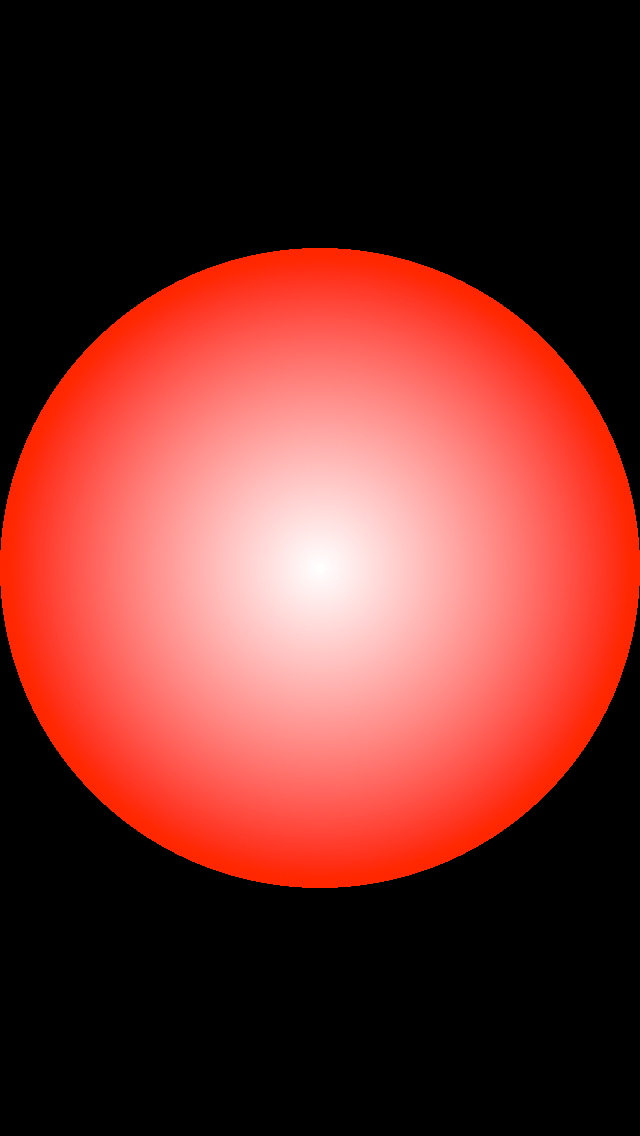
灵活的应用CGContextDrawRadialGradient()方法可以创建出伪立体效果的图形,例如如下代码:
1
2
3
4
5
6
7
8
9
10
11
12
-(void)drawRect:(CGRect)rect{
CGGradientRef gradientRef;
CGColorSpaceRef colorSpaceRef;
CGFloat locs[2] = {0,1};
CGFloat colors[8] = { 1.0, 0, 0, 1.0, // 前4个为起始颜色的rgba
1, 1, 1, 1.0 }; // 后4个为结束颜色的rgba
colorSpaceRef = CGColorSpaceCreateWithName(kCGColorSpaceGenericRGB);
gradientRef = CGGradientCreateWithColorComponents (colorSpaceRef, colors,
locs, 2);
CGContextRef contextRef = UIGraphicsGetCurrentContext();
CGContextDrawRadialGradient(contextRef, gradientRef, CGPointMake(rect.origin.x+rect.size.width/2, rect.origin.y+rect.size.height/2), rect.size.width/2, CGPointMake(rect.origin.x+rect.size.width/2, rect.origin.y+rect.size.height/2-100), 0, 0);
}

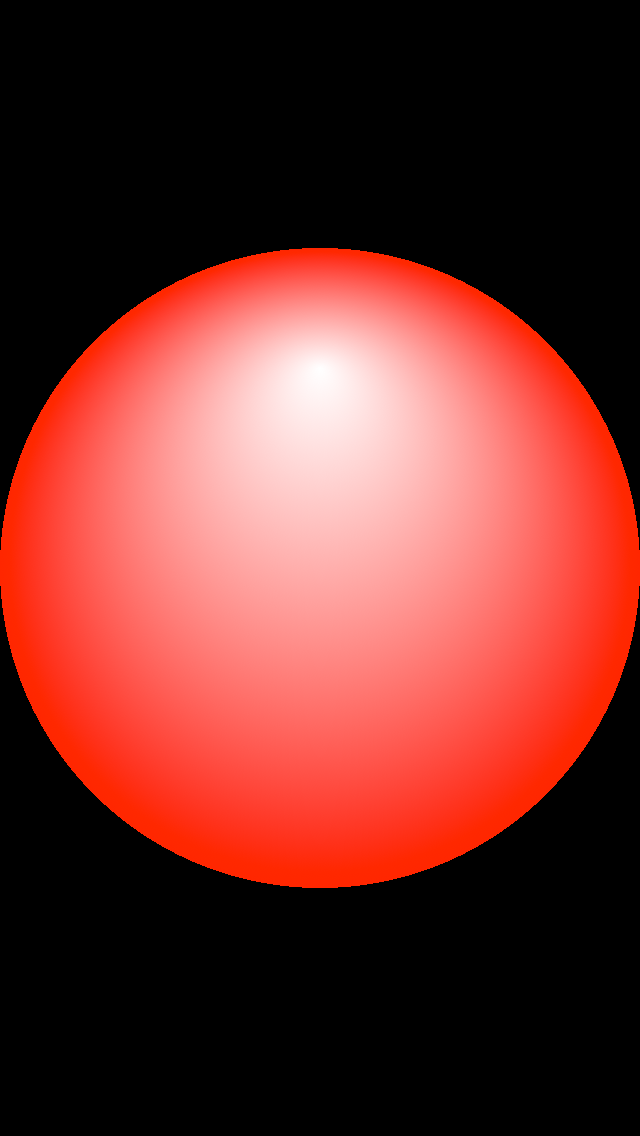
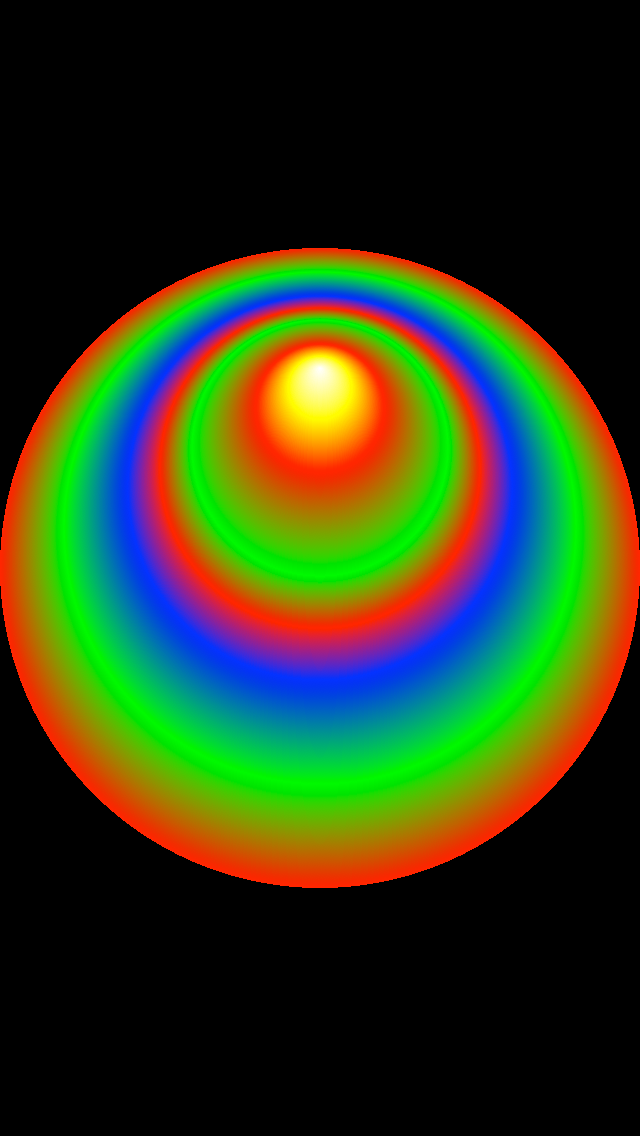
通过调整内圆的位置和半径,可以做到光影的移动,效果如下:

1
2
3
4
5
6
7
8
9
10
11
12
13
14
15
16
17
18
19
20
//模拟金属原子
-(void)drawRect:(CGRect)rect{
CGGradientRef gradientRef;
CGColorSpaceRef colorSpaceRef;
CGFloat locs[8] = {0,0.2,0.4,0.5,0.6,0.8,0.9,1.0};
CGFloat colors[64] = { 1.0, 0, 0, 1.0, // 前4个为起始颜色的rgba
0.0, 1, 0, 1.0,
0.0, 0, 1, 1.0,
1.0, 0, 0, 1.0,
0.0, 1, 0, 1.0,
1.0, 0, 0, 1.0,
1.0, 1, 0, 1.0,
1, 1, 1, 1.0 }; // 后4个为结束颜色的rgba
colorSpaceRef = CGColorSpaceCreateWithName(kCGColorSpaceGenericRGB);
gradientRef = CGGradientCreateWithColorComponents (colorSpaceRef, colors,
locs, 8);
CGContextRef contextRef = UIGraphicsGetCurrentContext();
// CGContextDrawLinearGradient(contextRef, gradientRef, rect.origin, CGPointMake(rect.origin.x+rect.size.width, rect.origin.y+rect.size.height), 0);
CGContextDrawRadialGradient(contextRef, gradientRef, CGPointMake(rect.origin.x+rect.size.width/2, rect.origin.y+rect.size.height/2), rect.size.width/2, CGPointMake(rect.origin.x+rect.size.width/2, rect.origin.y+rect.size.height/2-100), 0, 0);
}

专注技术,热爱生活,交流技术,也做朋友。

——珲少 QQ群:203317592