iOS开发之CoreImage框架使用
CoreImage框架是一个专门用来对图片进行处理的框架,其中提供了许多高级功能,可以帮助开发者完成UIKit或者CoreGraphics框架无法完成的任务,并且使用CoreImage框架可以十分轻松的实现滤镜以及图像识别等流行技术。本篇博客主要介绍和总结CoreImage框架的使用,并提供范例代码。
一、图像过滤器
1.几组内置的过滤器
CIFilter是CoreImage中提供的图像过滤器,也可以将其理解为滤镜。许多美颜应用,图像处理应用等都是为原图添加了滤镜效果。本节我们着重看下与这个类相关的应用。首先,CoreImaghe默认提供了非常多的滤镜效果,但是并没有详细的文档介绍,有关滤镜效果可以分为下面几个类别:
1
2
3
4
5
6
7
8
9
10
11
12
13
14
15
16
17
18
19
20
21
22
23
24
25
26
27
28
29
30
31
32
33
34
35
36
37
38
39
40
|
NSString * const kCICategoryDistortionEffect;
NSString * const kCICategoryGeometryAdjustment;
NSString * const kCICategoryCompositeOperation;
NSString * const kCICategoryHalftoneEffect;
NSString * const kCICategoryColorEffect;
NSString * const kCICategoryTransition;
NSString * const kCICategoryTileEffect;
NSString * const kCICategoryGenerator;
NSString * const kCICategoryReduction;
NSString * const kCICategoryGradient;
NSString * const kCICategoryStylize;
NSString * const kCICategorySharpen;
NSString * const kCICategoryBlur;
NSString * const kCICategoryVideo;
NSString * const kCICategoryStillImage;
NSString * const kCICategoryInterlaced;
NSString * const kCICategoryNonSquarePixels;
NSString * const kCICategoryHighDynamicRange;
NSString * const kCICategoryBuiltIn;
NSString * const kCICategoryFilterGenerator;
|
上面列出了非常多的类别,其实上面只是按照不同的场景将过滤器进行了分类,每个分类中都定义了许多内置的过滤器,使用下面的方法可以获取每个分类下提供的过滤器:
1
2
3
4
|
+ (NSArray<NSString *> *)filterNamesInCategory:(nullable NSString *)category;
+ (NSArray<NSString *> *)filterNamesInCategories:(nullable NSArray<NSString *> *)categories;
|
2.过滤器的一个简单示例
下面示例代码演示过滤器的简单应用:
1
2
3
4
5
6
7
8
9
10
11
12
13
14
15
| UIImage * img = [UIImage imageNamed:@"1.png"];
CIImage * image = [[CIImage alloc]initWithImage:img];
CIFilter * filter = [CIFilter filterWithName:@"CIBoxBlur" keysAndValues:kCIInputImageKey,image, nil];
[filter setDefaults];
CIContext * context = [[CIContext alloc]initWithOptions:nil];
CIImage * output = [filter outputImage];
CGImageRef ref = [context createCGImage:output fromRect:[output extent]];
UIImage * newImage = [UIImage imageWithCGImage:ref];
CGImageRelease(ref);
UIImageView * imageView = [[UIImageView alloc]initWithFrame:CGRectMake(170, 30, 150, 400)];
imageView.image = newImage;
[self.view addSubview:imageView];
UIImageView * imageView2 = [[UIImageView alloc]initWithFrame:CGRectMake(0, 30, 150, 400)];
imageView2.image = img;
[self.view addSubview:imageView2];
|
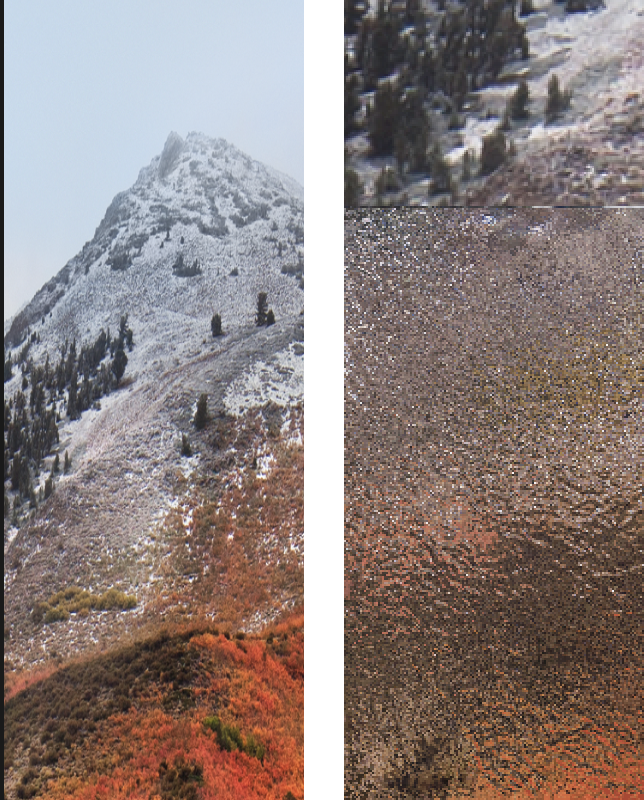
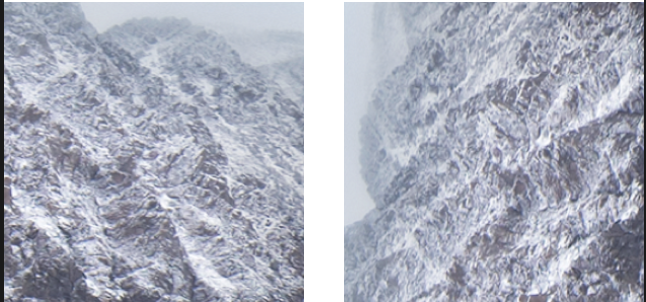
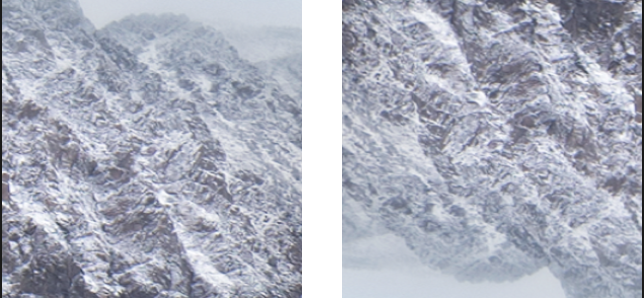
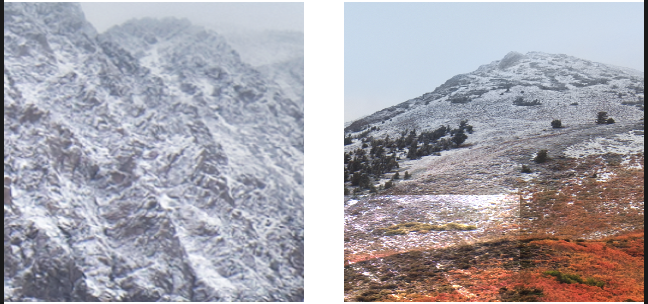
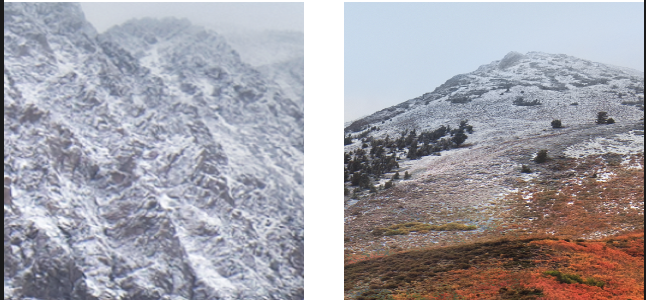
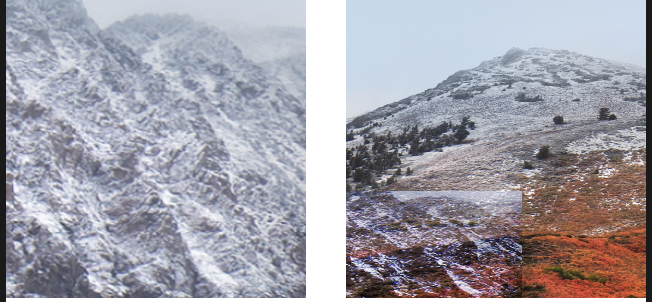
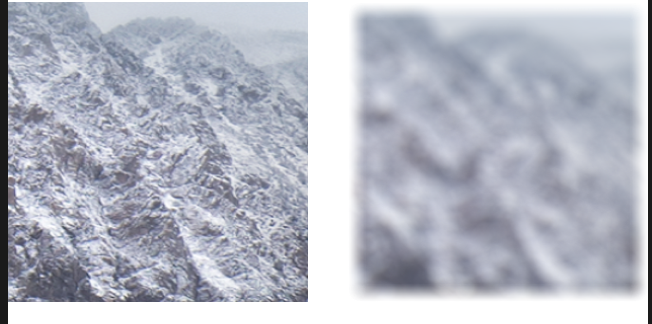
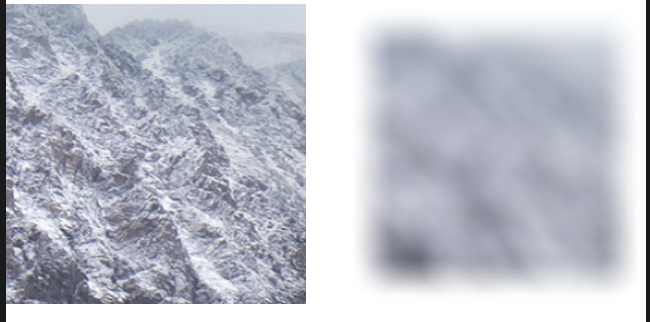
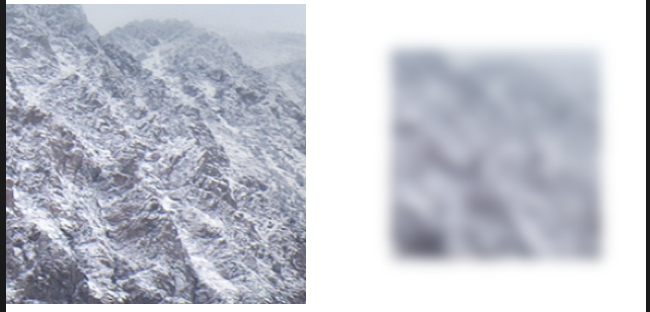
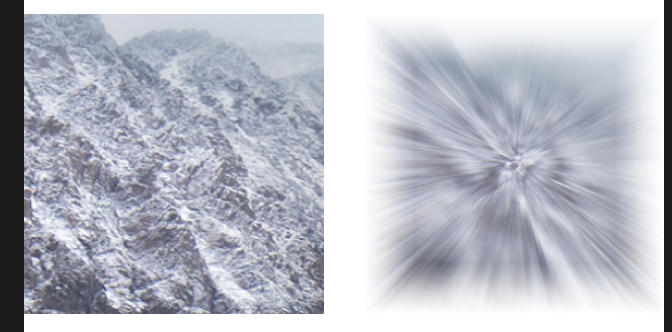
效果如下图:
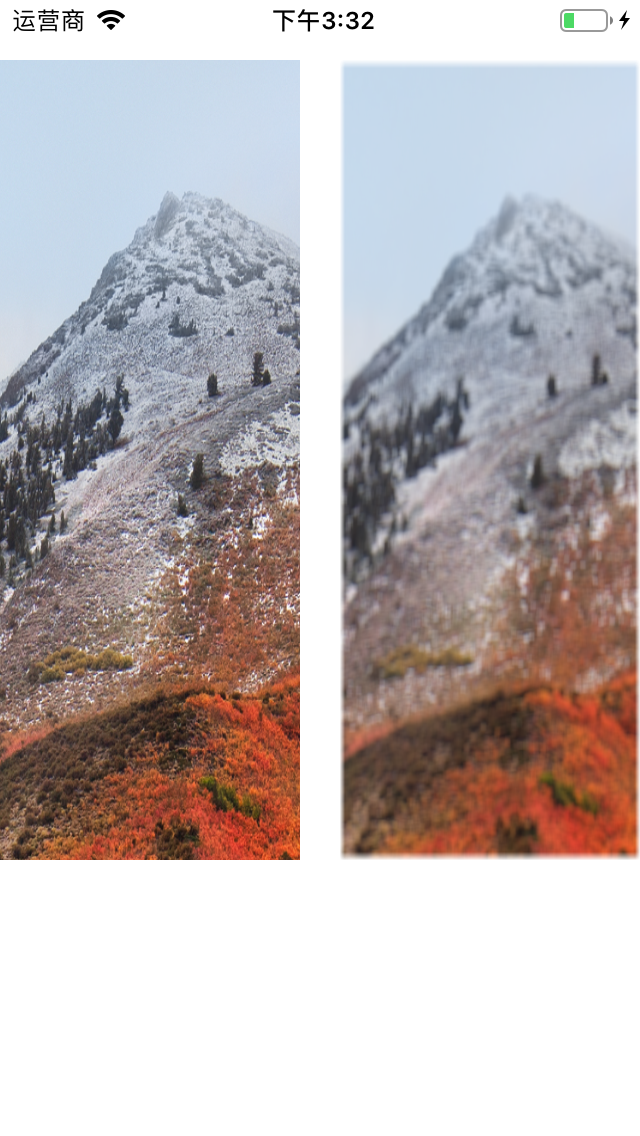
上面演示了简单的模糊过滤效果。
3.对CIFilter类进行解析
CIFilter类的解析如下:
1
2
3
4
5
6
7
8
9
10
11
12
13
14
15
16
17
18
19
20
21
22
23
24
25
26
27
28
29
30
31
32
33
34
35
36
37
38
39
40
41
42
|
@property (readonly, nonatomic, nullable) CIImage *outputImage;
@property (nonatomic, copy) NSString *name;
@property (getter=isEnabled) BOOL enabled;
@property (nonatomic, readonly) NSArray<NSString *> *inputKeys;
@property (nonatomic, readonly) NSArray<NSString *> *outputKeys;
- (void)setDefaults;
@property (nonatomic, readonly) NSDictionary<NSString *,id> *attributes;
- (nullable CIImage *)apply:(CIKernel *)k
arguments:(nullable NSArray *)args
options:(nullable NSDictionary<NSString *,id> *)dict;
- (nullable CIImage *)apply:(CIKernel *)k, ...;
+ (nullable CIFilter *) filterWithName:(NSString *) name;
+ (nullable CIFilter *)filterWithName:(NSString *)name
keysAndValues:key0, ...;
+ (nullable CIFilter *)filterWithName:(NSString *)name
withInputParameters:(nullable NSDictionary<NSString *,id> *)params;
+ (void)registerFilterName:(NSString *)name
constructor:(id<CIFilterConstructor>)anObject
classAttributes:(NSDictionary<NSString *,id> *)attributes;
+ (nullable NSData*)serializedXMPFromFilters:(NSArray<CIFilter *> *)filters
inputImageExtent:(CGRect)extent;
+ (NSArray<CIFilter *> *)filterArrayFromSerializedXMP:(NSData *)xmpData
inputImageExtent:(CGRect)extent
error:(NSError **)outError;
|
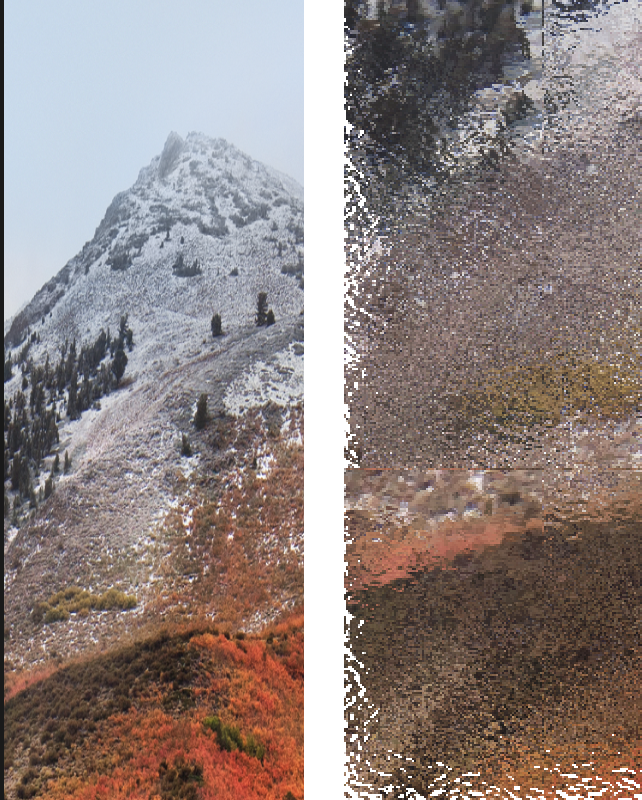
4.常用过滤器详解
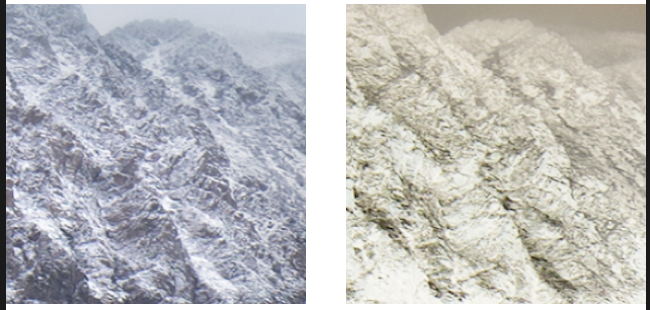
这个过滤器的作用是在图片的某个区域创建一块凸起。示例代码如下:
1
2
3
4
5
6
|
CIFilter * filter = [CIFilter filterWithName:@"CIBumpDistortion" keysAndValues:kCIInputImageKey,image,kCIInputCenterKey,[[CIVector alloc] initWithX:100 Y:200],kCIInputScaleKey,@-1,kCIInputRadiusKey,@150, nil];
|
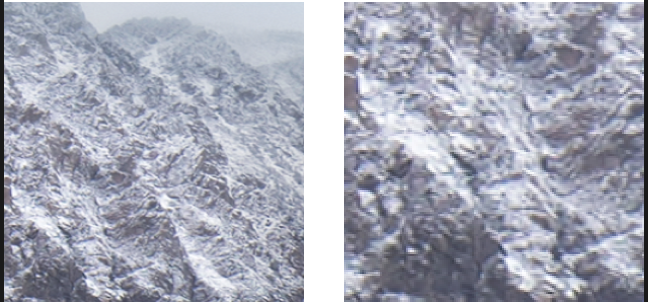
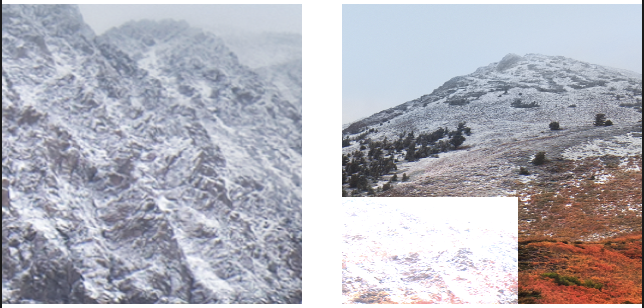
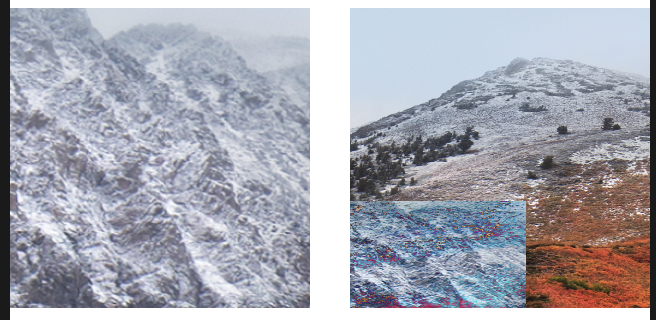
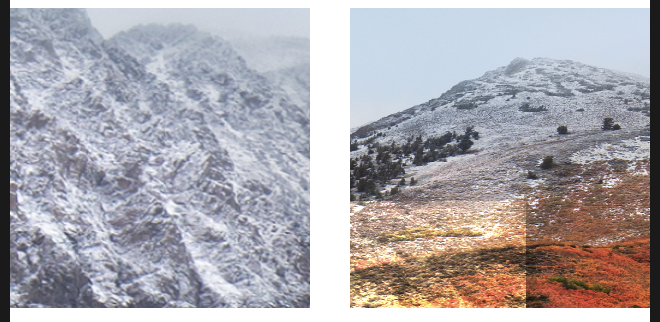
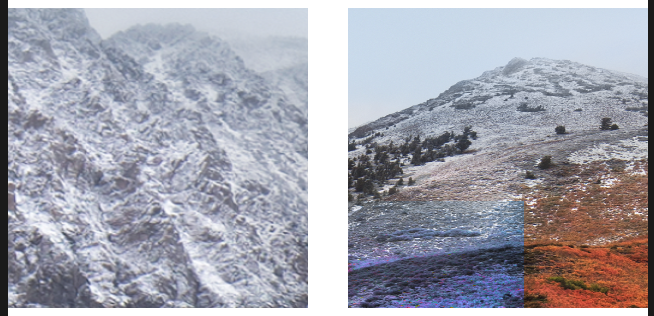
效果如下:
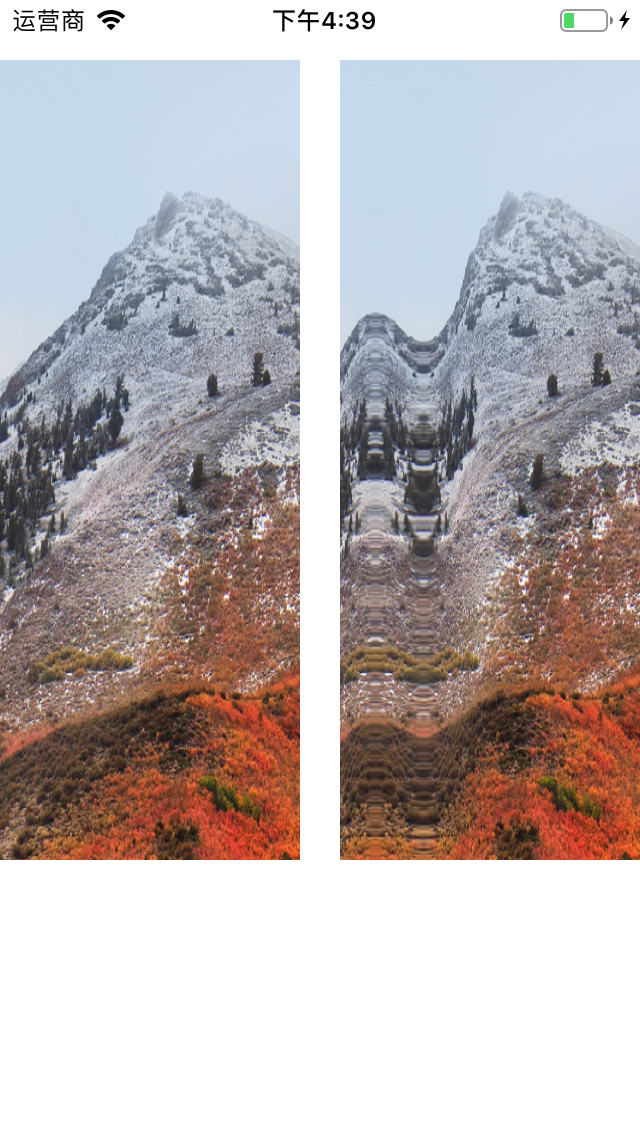
这个过滤器创建类似波纹效果,示例如下:
1
2
3
4
5
|
CIFilter * filter = [CIFilter filterWithName:@"CIBumpDistortionLinear" keysAndValues:kCIInputImageKey,image,kCIInputCenterKey,[[CIVector alloc] initWithX:100 Y:200],kCIInputScaleKey,@-1,kCIInputRadiusKey,@150,kCIInputAngleKey,@(M_PI_2), nil];
|
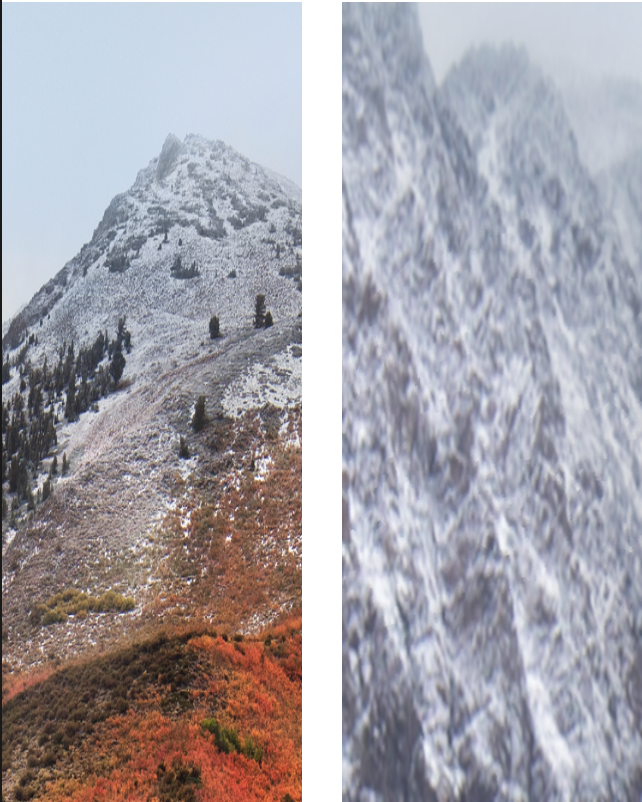
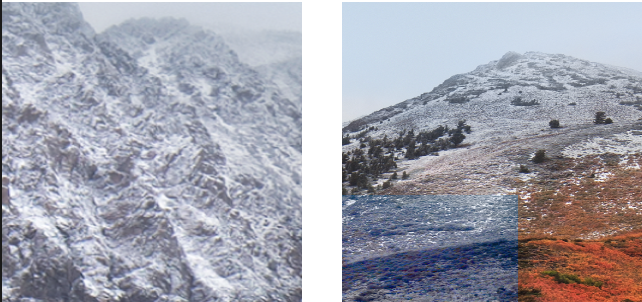
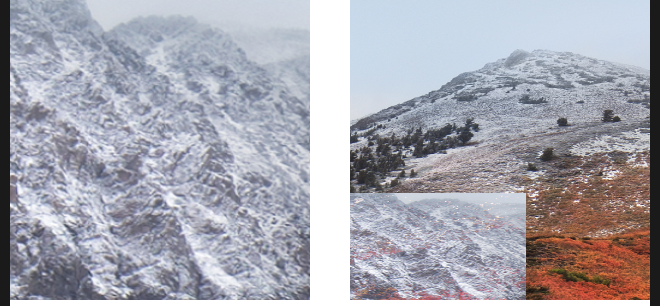
效果如下:
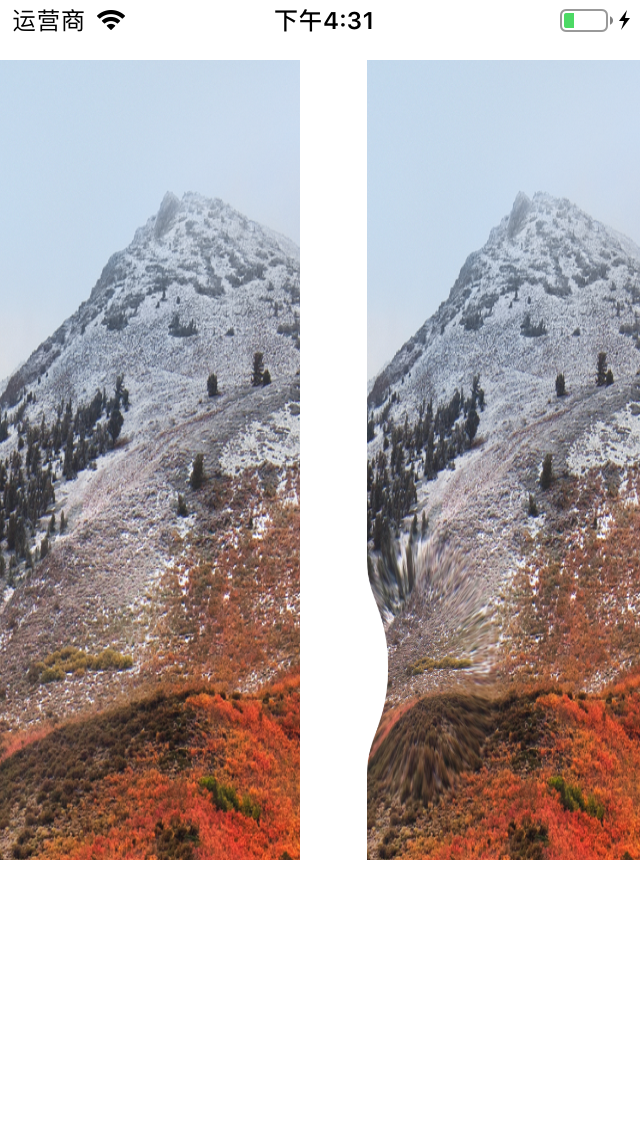
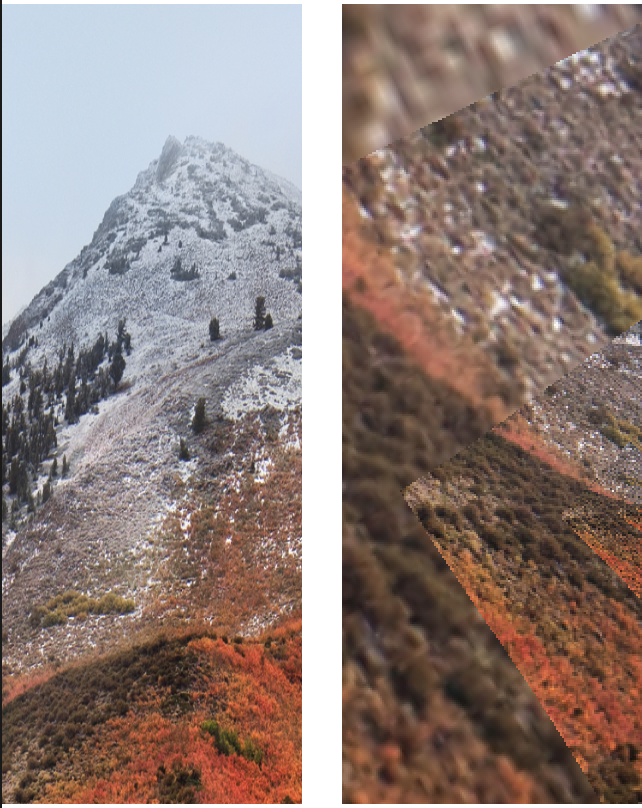
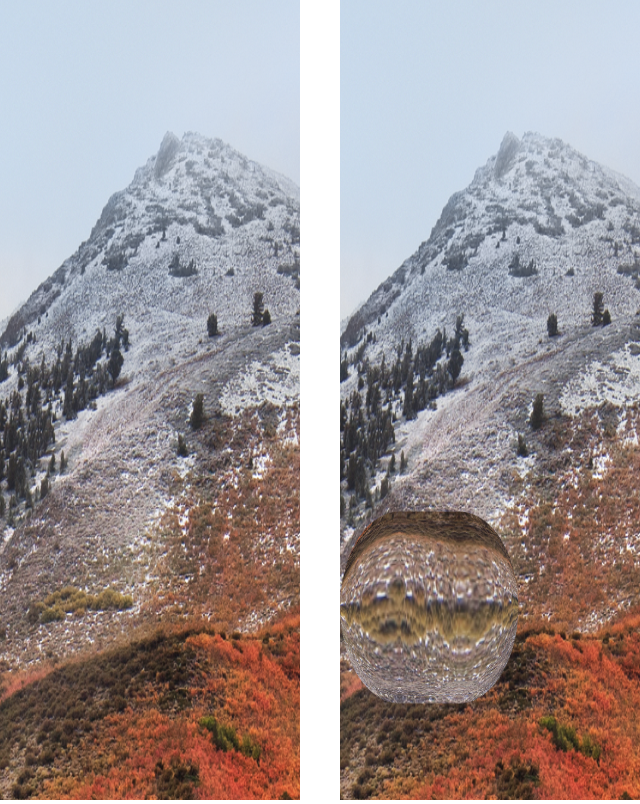
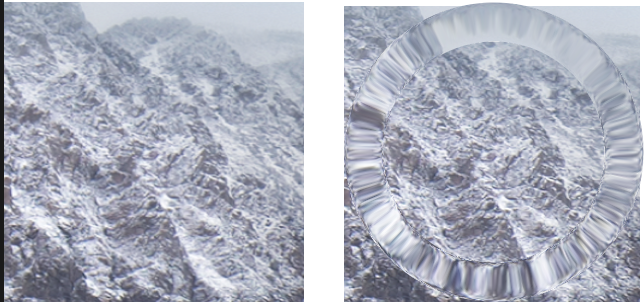
这个过滤器的作用是选取图像的某个区域,对其四周进行飞溅拉伸,例如:
1
| CIFilter * filter = [CIFilter filterWithName:@"CICircleSplashDistortion" keysAndValues:kCIInputImageKey,image,kCIInputCenterKey,[[CIVector alloc] initWithX:100 Y:200],kCIInputRadiusKey,@50, nil];
|
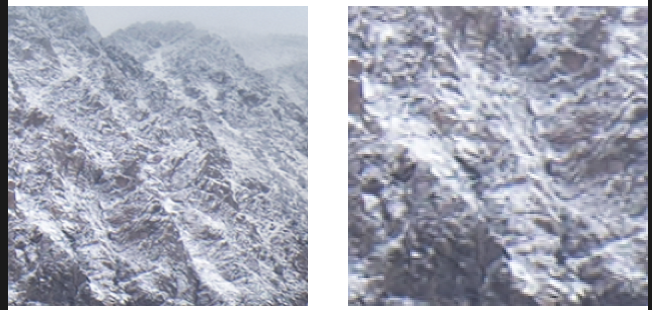
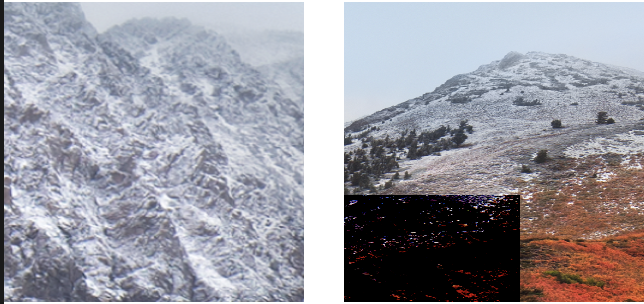
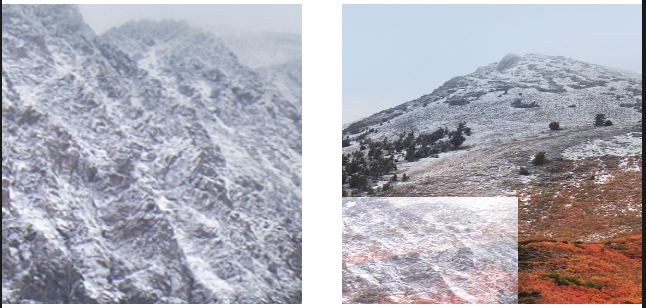
效果如下:
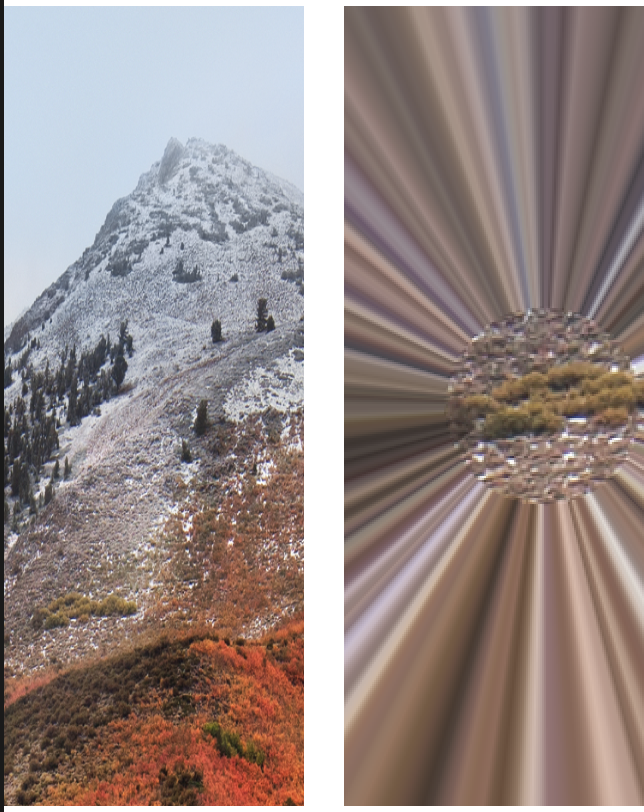
这个过滤器选取某个区域,进行缠绕效果,例如:
1
| CIFilter * filter = [CIFilter filterWithName:@"CICircularWrap" keysAndValues:kCIInputImageKey,image,kCIInputCenterKey,[[CIVector alloc] initWithX:100 Y:200],kCIInputRadiusKey,@20, kCIInputAngleKey,@3,nil];
|
效果如下:
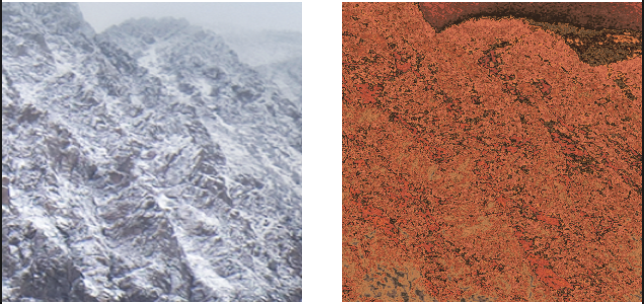
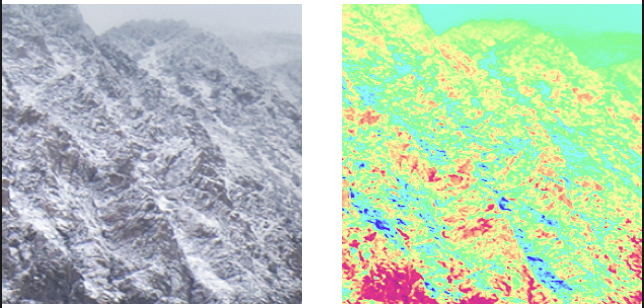
这个过滤器将提供混合图像的灰度值应用于目标图像,例如:
1
2
3
4
|
CIFilter * filter = [CIFilter filterWithName:@"CIDroste" keysAndValues:kCIInputImageKey,image,kCIInputScaleKey,@200,@"inputDisplacementImage",image2,nil];
|
效果如下:
1
| CIFilter * filter = [CIFilter filterWithName:@"CIDroste" keysAndValues:kCIInputImageKey,image,@"inputInsetPoint0",[[CIVector alloc] initWithX:100 Y:100],@"inputInsetPoint1",[[CIVector alloc] initWithX:200 Y:200],@"inputPeriodicity",@1,@"inputRotation",@0,@"inputStrands",@1,@"inputZoom",@1,nil];
|
效果如下:
这个过滤器用提供图片作为目标图片的纹理,进行混合,例如:
1
2
3
4
|
CIFilter * filter = [CIFilter filterWithName:@"CIGlassDistortion" keysAndValues:kCIInputImageKey,image,kCIInputCenterKey,[[CIVector alloc] initWithX:100 Y:200],kCIInputScaleKey,@100,@"inputTexture",image2,nil];
|
效果如下:
1
2
3
4
5
6
7
|
CIFilter * filter = [CIFilter filterWithName:@"CIGlassLozenge" keysAndValues:kCIInputImageKey,image,@"inputPoint0",[[CIVector alloc] initWithX:100 Y:200],@"inputPoint1",[[CIVector alloc] initWithX:200 Y:200],@"inputRadius",@100,@"inputRefraction",@2,nil];
|
效果如下:
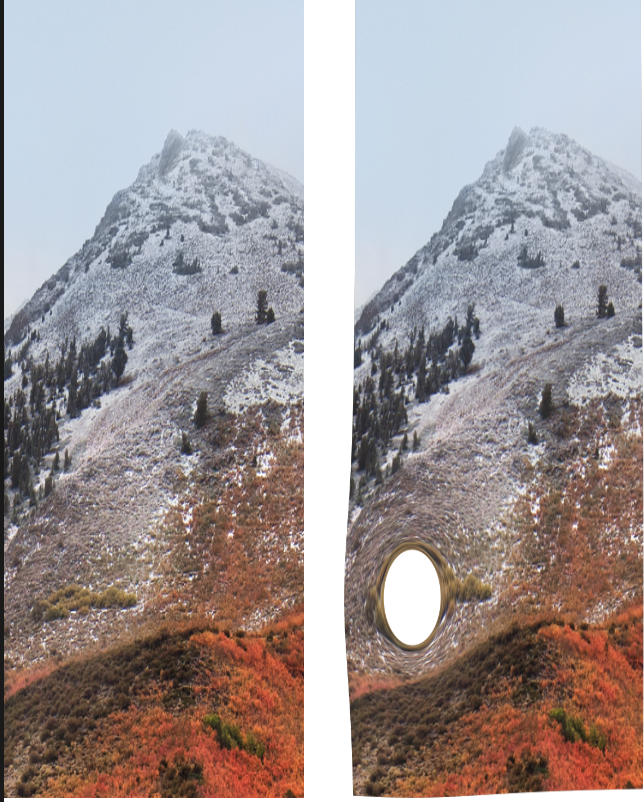
1
| CIFilter * filter = [CIFilter filterWithName:@"CIHoleDistortion" keysAndValues:kCIInputImageKey,image,@"inputRadius",@50,kCIInputCenterKey,[[CIVector alloc] initWithX:100 Y:200],nil];
|
效果如下:
1
| CIFilter * filter = [CIFilter filterWithName:@"CINinePartStretched" keysAndValues:kCIInputImageKey,image2,@"inputBreakpoint0",[[CIVector alloc] initWithX:50 Y:50],@"inputBreakpoint1",[[CIVector alloc] initWithX:100 Y:100],@"inputGrowAmount",[[CIVector alloc] initWithX:50 Y:50],nil];
|
效果如下:
1
| CIFilter * filter = [CIFilter filterWithName:@"CINinePartTiled" keysAndValues:kCIInputImageKey,image2,@"inputBreakpoint0",[[CIVector alloc] initWithX:50 Y:50],@"inputBreakpoint1",[[CIVector alloc] initWithX:100 Y:100],@"inputGrowAmount",[[CIVector alloc] initWithX:50 Y:50],@"inputFlipYTiles",@1,nil];
|
效果如下:
1
| CIFilter * filter = [CIFilter filterWithName:@"CIPinchDistortion" keysAndValues:kCIInputImageKey,image2,@"inputCenter",[[CIVector alloc] initWithX:150 Y:150],@"inputRadius",@500,@"inputScale",@1,nil];
|
效果如下:
1
2
3
4
|
CIFilter * filter = [CIFilter filterWithName:@"CIStretchCrop" keysAndValues:kCIInputImageKey,image2,@"inputCenterStretchAmount",@1,@"inputCropAmount",@0.5,@"inputSize",[[CIVector alloc] initWithX:300 Y:150],nil];
|
效果如下:

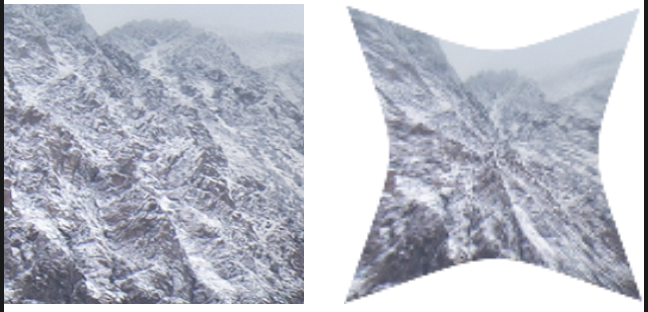
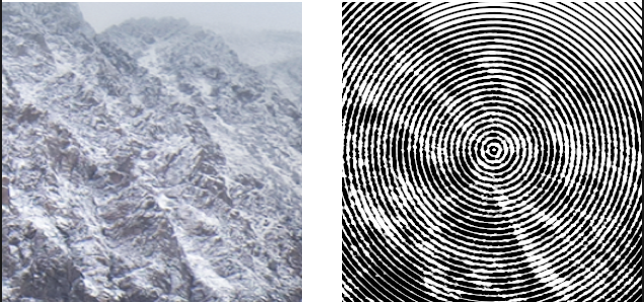
这个过滤器创建一个环状透镜,对图像进行扭曲。
1
2
3
4
5
6
7
|
CIFilter * filter = [CIFilter filterWithName:@"CITorusLensDistortion" keysAndValues:kCIInputImageKey,image2,@"inputCenter",[[CIVector alloc] initWithX:150 Y:150],@"inputRadius",@150,@"inputRefraction",@1.6,@"inputWidth",@40,nil];
|
效果如下:
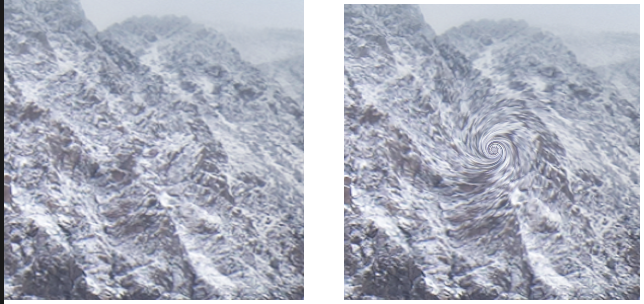
1
| CIFilter * filter = [CIFilter filterWithName:@"CITwirlDistortion" keysAndValues:kCIInputImageKey,image2,@"inputAngle",@3.14,@"inputCenter",[[CIVector alloc] initWithX:150 Y:150],@"inputRadius",@150,nil];
|
效果如下:
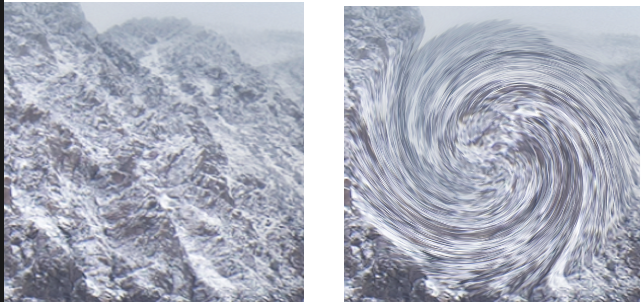
1
2
|
CIFilter * filter = [CIFilter filterWithName:@"CIVortexDistortion" keysAndValues:kCIInputImageKey,image2,@"inputAngle",@(M_PI*10),@"inputCenter",[[CIVector alloc] initWithX:150 Y:150],@"inputRadius",@150,nil];
|
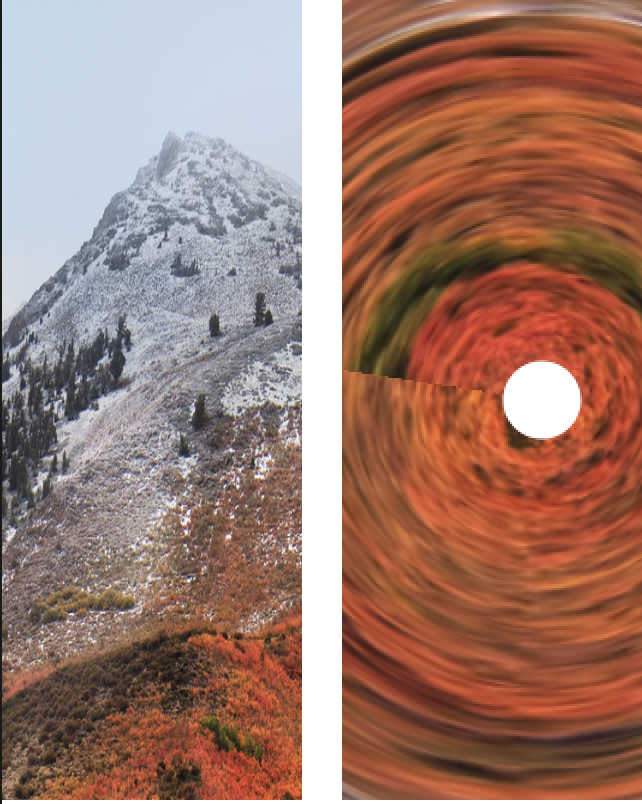
效果如下:
这个过滤器对图像进行简单的形变处理,如缩放,旋转,平移等。
1
2
| CGAffineTransform tr = CGAffineTransformMakeRotation(M_PI_2);
CIFilter * filter = [CIFilter filterWithName:@"CIAffineTransform" keysAndValues:kCIInputImageKey,image2,@"inputTransform",[NSValue valueWithCGAffineTransform:tr],nil];
|
效果如下:
1
| CIFilter * filter = [CIFilter filterWithName:@"CICrop" keysAndValues:kCIInputImageKey,image2,@"inputRectangle",[[CIVector alloc] initWithCGRect:CGRectMake(0, 0, 150, 150)],nil];
|
效果如下:
1
| CIFilter * filter = [CIFilter filterWithName:@"CIEdgePreserveUpsampleFilter" keysAndValues:kCIInputImageKey,image,@"inputLumaSigma",@0.15,@"inputSpatialSigma",@3,@"inputSmallImage",image2,nil];
|
效果如下:
1
| CIFilter * filter = [CIFilter filterWithName:@"CIPerspectiveCorrection" keysAndValues:kCIInputImageKey,image2,@"inputBottomLeft",[[CIVector alloc] initWithX:0 Y:0],@"inputBottomRight",[[CIVector alloc] initWithX:150 Y:0],@"inputTopLeft",[[CIVector alloc] initWithX:0 Y:150],@"inputTopRight",[[CIVector alloc] initWithX:150 Y:150],nil];
|
效果如图:
1
| CIFilter * filter = [CIFilter filterWithName:@"CIStraightenFilter" keysAndValues:kCIInputImageKey,image2,@"inputAngle",@3.14,nil];
|
效果如下:
通过提供一个图像作为背景与目标图像进行混合。
1
| CIFilter * filter = [CIFilter filterWithName:@"CIAdditionCompositing" keysAndValues:kCIInputImageKey,image2,@"inputBackgroundImage",image,nil];
|
效果如下:
1
| CIFilter * filter = [CIFilter filterWithName:@"CIColorBlendMode" keysAndValues:kCIInputImageKey,image2,@"inputBackgroundImage",image,nil];
|
效果如下:
1
| CIFilter * filter = [CIFilter filterWithName:@"CIColorBurnBlendMode" keysAndValues:kCIInputImageKey,image2,@"inputBackgroundImage",image,nil];
|
效果如下:
1
| CIFilter * filter = [CIFilter filterWithName:@"CIColorDodgeBlendMode" keysAndValues:kCIInputImageKey,image2,@"inputBackgroundImage",image,nil];
|
暗选择混合模式过滤器
这个过滤器将选择较暗的图像作为混合背景,例如:
1
| CIFilter * filter = [CIFilter filterWithName:@"CIDarkenBlendMode" keysAndValues:kCIInputImageKey,image2,@"inputBackgroundImage",image,nil];
|
效果如下:
这个过滤器将选择较亮的图像作为混合背景,例如:
1
| CIFilter * filter = [CIFilter filterWithName:@"CIDifferenceBlendMode" keysAndValues:kCIInputImageKey,image2,@"inputBackgroundImage",image,nil];
|
效果如下:
1
| CIFilter * filter = [CIFilter filterWithName:@"CIDivideBlendMode" keysAndValues:kCIInputImageKey,image2,@"inputBackgroundImage",image,nil];
|
效果如下:
1
| CIFilter * filter = [CIFilter filterWithName:@"CIExclusionBlendMode" keysAndValues:kCIInputImageKey,image2,@"inputBackgroundImage",image,nil];
|
效果如下:

1
| CIFilter * filter = [CIFilter filterWithName:@"CIHardLightBlendMode" keysAndValues:kCIInputImageKey,image2,@"inputBackgroundImage",image,nil];
|
效果如下:
1
| CIFilter * filter = [CIFilter filterWithName:@"CIHueBlendMode" keysAndValues:kCIInputImageKey,image2,@"inputBackgroundImage",image,nil];
|
效果如下:
1
| CIFilter * filter = [CIFilter filterWithName:@"CILightenBlendMode" keysAndValues:kCIInputImageKey,image2,@"inputBackgroundImage",image,nil];
|
效果如下:
1
| CIFilter * filter = [CIFilter filterWithName:@"CILinearBurnBlendMode" keysAndValues:kCIInputImageKey,image2,@"inputBackgroundImage",image,nil];
|
效果如下:

1
| CIFilter * filter = [CIFilter filterWithName:@"CILinearDodgeBlendMode" keysAndValues:kCIInputImageKey,image2,@"inputBackgroundImage",image,nil];
|
效果如下:
1
| CIFilter * filter = [CIFilter filterWithName:@"CILuminosityBlendMode" keysAndValues:kCIInputImageKey,image2,@"inputBackgroundImage",image,nil];
|
效果如下:
1
| CIFilter * filter = [CIFilter filterWithName:@"CIMaximumCompositing" keysAndValues:kCIInputImageKey,image2,@"inputBackgroundImage",image,nil];
|
效果如下:
1
| CIFilter * filter = [CIFilter filterWithName:@"CIMinimumCompositing" keysAndValues:kCIInputImageKey,image2,@"inputBackgroundImage",image,nil];
|
效果如下:

1
| CIFilter * filter = [CIFilter filterWithName:@"CIMultiplyBlendMode" keysAndValues:kCIInputImageKey,image2,@"inputBackgroundImage",image,nil];
|
效果如下:
1
| CIFilter * filter = [CIFilter filterWithName:@"CIMultiplyCompositing" keysAndValues:kCIInputImageKey,image2,@"inputBackgroundImage",image,nil];
|

1
| CIFilter * filter = [CIFilter filterWithName:@"CIOverlayBlendMode" keysAndValues:kCIInputImageKey,image2,@"inputBackgroundImage",image,nil];
|
1
| CIFilter * filter = [CIFilter filterWithName:@"CIPinLightBlendMode" keysAndValues:kCIInputImageKey,image2,@"inputBackgroundImage",image,nil];
|
1
| CIFilter * filter = [CIFilter filterWithName:@"CISaturationBlendMode" keysAndValues:kCIInputImageKey,image2,@"inputBackgroundImage",image,nil];
|
1
| CIFilter * filter = [CIFilter filterWithName:@"CIScreenBlendMode" keysAndValues:kCIInputImageKey,image2,@"inputBackgroundImage",image,nil];
|
1
| CIFilter * filter = [CIFilter filterWithName:@"CISourceAtopCompositing" keysAndValues:kCIInputImageKey,image2,@"inputBackgroundImage",image,nil];
|
1
2
3
4
5
|
CIFilter * filter = [CIFilter filterWithName:@"CICircularScreen" keysAndValues:kCIInputImageKey,image2,kCIInputCenterKey,[[CIVector alloc] initWithX:150 Y:150],@"inputSharpness",@0.7,@"inputWidth",@6,nil];
|
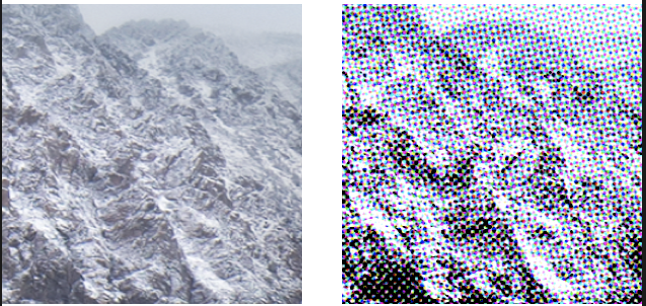
1
| CIFilter * filter = [CIFilter filterWithName:@"CICMYKHalftone" keysAndValues:kCIInputImageKey,image2,@"inputAngle",@0,kCIInputCenterKey,[[CIVector alloc] initWithX:150 Y:150],@"inputGCR",@1,@"inputSharpness",@0.7,@"inputUCR",@0.5,@"inputWidth",@6,nil];
|
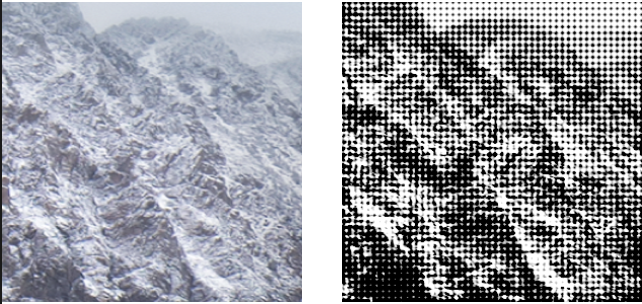
1
| CIFilter * filter = [CIFilter filterWithName:@"CIDotScreen" keysAndValues:kCIInputImageKey,image2,@"inputAngle",@0,kCIInputCenterKey,[[CIVector alloc] initWithX:150 Y:150],@"inputSharpness",@0.7,@"inputWidth",@6,nil];
|
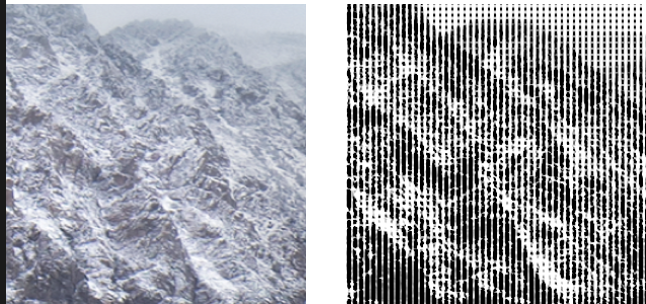
1
| CIFilter * filter = [CIFilter filterWithName:@"CIHatchedScreen" keysAndValues:kCIInputImageKey,image2,@"inputAngle",@0,kCIInputCenterKey,[[CIVector alloc] initWithX:150 Y:150],@"inputSharpness",@0.7,@"inputWidth",@6,nil];
|
1
| CIFilter * filter = [CIFilter filterWithName:@"CILinearToSRGBToneCurve" keysAndValues:kCIInputImageKey,image2,nil];
|

1
| CIFilter * filter = [CIFilter filterWithName:@"CIColorInvert" keysAndValues:kCIInputImageKey,image2,nil];
|
1
| CIFilter * filter = [CIFilter filterWithName:@"CIColorMap" keysAndValues:kCIInputImageKey,image2,@"inputGradientImage",image,nil];
|
1
2
3
4
5
|
CIFilter * filter = [CIFilter filterWithName:@"CIColorMonochrome" keysAndValues:kCIInputImageKey,image2,@"inputColor",[CIColor colorWithRed:0.5 green:0.5 blue:0.5],@"inputIntensity",@1,nil];
|
1
2
3
4
|
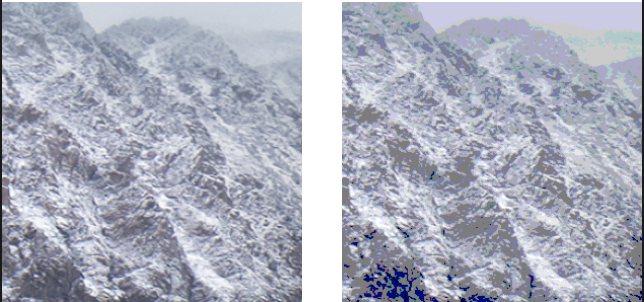
CIFilter * filter = [CIFilter filterWithName:@"CIColorPosterize" keysAndValues:kCIInputImageKey,image2,@"inputLevels",@6,nil];
|
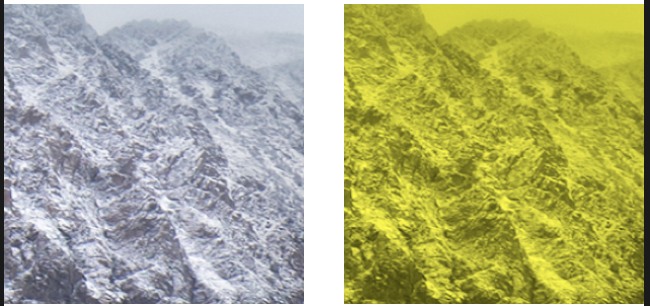
1
| CIFilter * filter = [CIFilter filterWithName:@"CIFalseColor" keysAndValues:kCIInputImageKey,image2,@"inputColor0",[CIColor colorWithRed:0 green:0 blue:0],@"inputColor1",[CIColor colorWithRed:1 green:1 blue:0],nil];
|
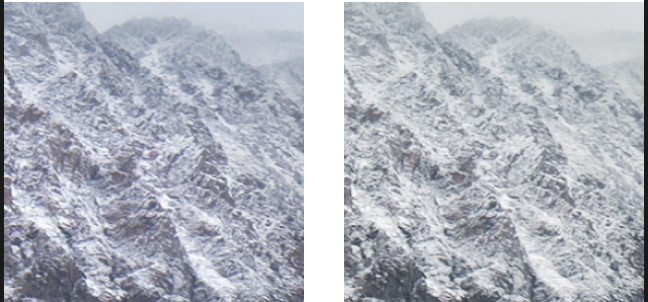
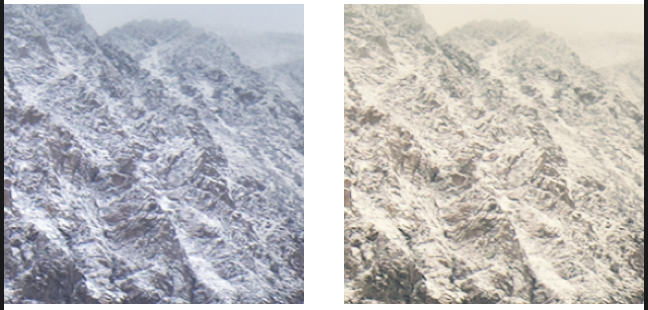
1
| CIFilter * filter = [CIFilter filterWithName:@"CIPhotoEffectFade" keysAndValues:kCIInputImageKey,image2,nil];
|
1
| CIFilter * filter = [CIFilter filterWithName:@"CIPhotoEffectInstant" keysAndValues:kCIInputImageKey,image2,nil];
|
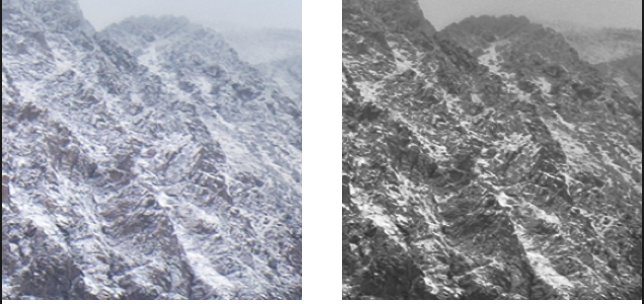
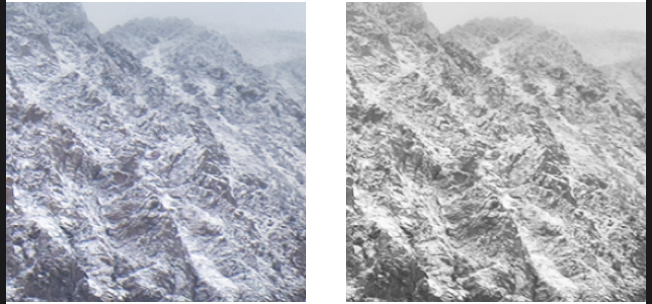
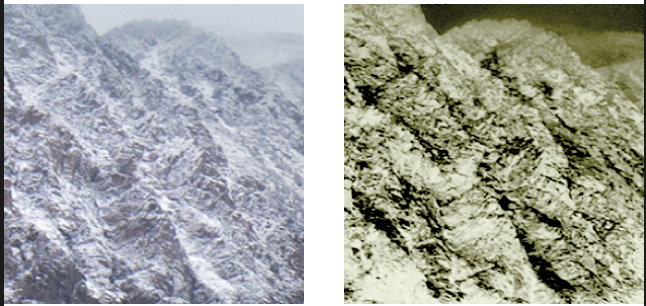
1
| CIFilter * filter = [CIFilter filterWithName:@"CIPhotoEffectMono" keysAndValues:kCIInputImageKey,image2,nil];
|
1
| CIFilter * filter = [CIFilter filterWithName:@"CIPhotoEffectNoir" keysAndValues:kCIInputImageKey,image2,nil];
|
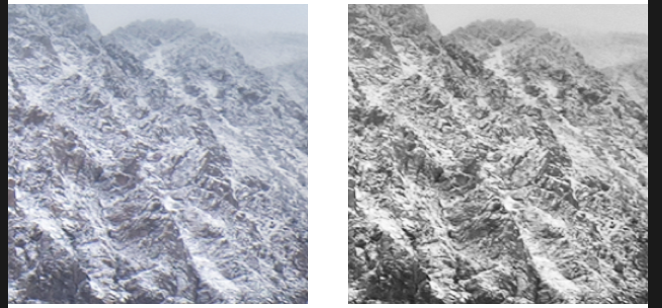
1
| CIFilter * filter = [CIFilter filterWithName:@"CIPhotoEffectProcess" keysAndValues:kCIInputImageKey,image2,nil];
|
1
| CIFilter * filter = [CIFilter filterWithName:@"CIPhotoEffectTransfer" keysAndValues:kCIInputImageKey,image2,nil];
|
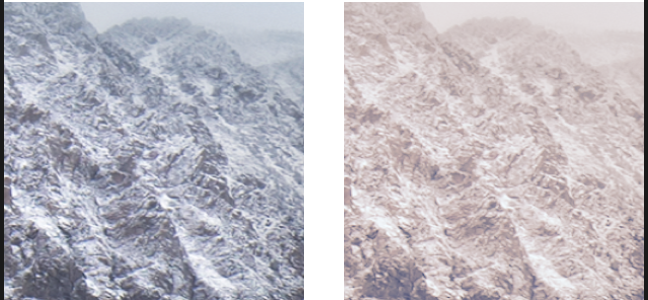
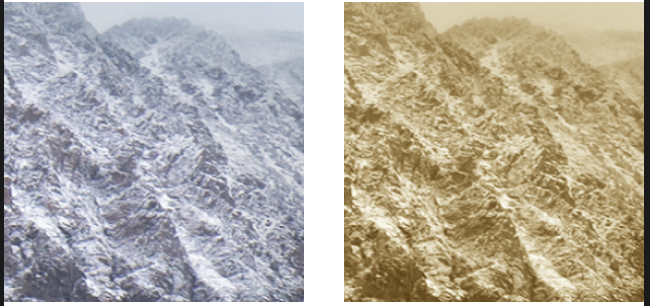
1
| CIFilter * filter = [CIFilter filterWithName:@"CISepiaTone" keysAndValues:kCIInputImageKey,image2,nil];
|
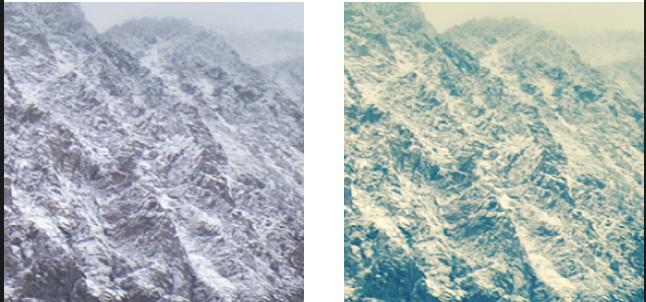
1
| CIFilter * filter = [CIFilter filterWithName:@"CIThermal" keysAndValues:kCIInputImageKey,image2,nil];
|
1
| CIFilter * filter = [CIFilter filterWithName:@"CIXRay" keysAndValues:kCIInputImageKey,image2,nil];
|
1
2
|
CIFilter * filter = [CIFilter filterWithName:@"CIBokehBlur" keysAndValues:kCIInputImageKey,image2,@"inputSoftness",@0.5,@"inputRingSize",@0.1,@"inputRingAmount",@0,@"inputRadius",@10,nil];
|
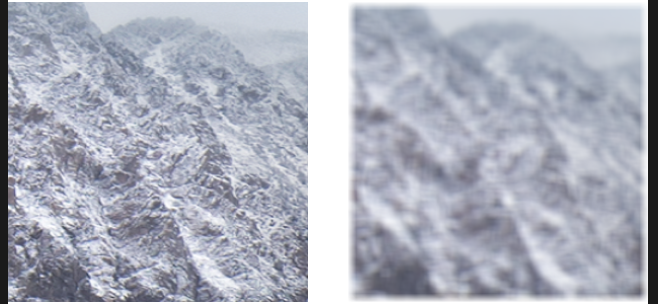
1
| CIFilter * filter = [CIFilter filterWithName:@"CIBoxBlur" keysAndValues:kCIInputImageKey,image2,@"inputRadius",@10,nil];
|
1
| CIFilter * filter = [CIFilter filterWithName:@"CIDiscBlur" keysAndValues:kCIInputImageKey,image2,@"inputRadius",@25,nil];
|
1
| CIFilter * filter = [CIFilter filterWithName:@"CIGaussianBlur" keysAndValues:kCIInputImageKey,image2,@"inputRadius",@10,nil];
|
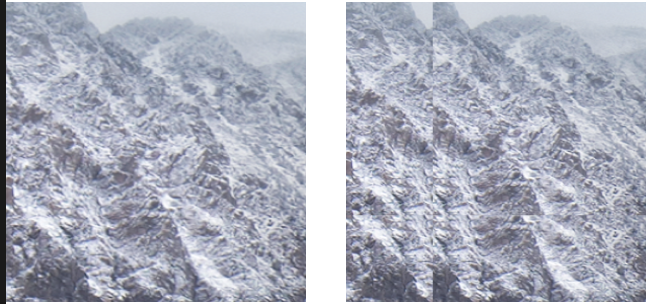
1
| CIFilter * filter = [CIFilter filterWithName:@"CIMorphologyGradient" keysAndValues:kCIInputImageKey,image2,@"inputRadius",@5,nil];
|
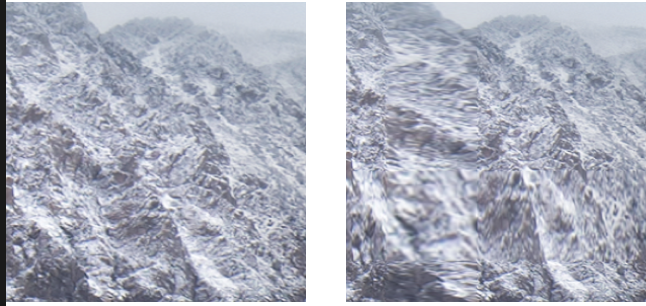
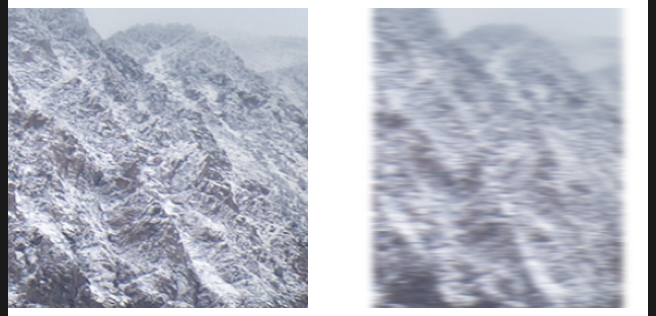
1
| CIFilter * filter = [CIFilter filterWithName:@"CIMotionBlur" keysAndValues:kCIInputImageKey,image2,@"inputRadius",@5,nil];
|
1
| CIFilter * filter = [CIFilter filterWithName:@"CIZoomBlur" keysAndValues:kCIInputImageKey,image2,nil];
|
5.自定义过滤器
上面演示了非常多的常用内置过滤器,我们也可以通过继承CIFilter来自定义过滤器。

自定义过滤器之前,首先需要了解CIKernel这个类,CIKernel是Core Image Kernel Language 的抽象对象。CIKL是CoreImage中专门用来编写像素处理函数的语言。
CIKernel相关类解析如下:
1
2
3
4
5
6
7
8
9
10
11
12
13
14
15
16
17
18
19
20
21
22
23
24
25
26
27
28
29
|
@interface CIKernel : NSObject
+ (nullable NSArray<CIKernel *> *)kernelsWithString:(NSString *)string;
+ (nullable instancetype)kernelWithString:(NSString *)string ;
@property (atomic, readonly) NSString *name ;
- (nullable CIImage *)applyWithExtent:(CGRect)extent
roiCallback:(CIKernelROICallback)callback
arguments:(nullable NSArray<id> *)args;
@end
@interface CIColorKernel : CIKernel
+ (nullable instancetype)kernelWithString:(NSString *)string;
- (nullable CIImage *)applyWithExtent:(CGRect)extent
arguments:(nullable NSArray<id> *)args;
@end
@interface CIWarpKernel : CIKernel
+ (nullable instancetype)kernelWithString:(NSString *)string;
@end
@interface CIBlendKernel : CIColorKernel
+ (nullable instancetype)kernelWithString:(NSString *)string;
- (nullable CIImage *)applyWithForeground:(CIImage*)foreground
background:(CIImage*)background;
@end
|
下面是一个简单的翻转图像的自定义过滤器示意,首先新建一个新的cikernel文件,命名为a.cikernel,如下:
1
2
3
4
5
6
7
| kernel vec2 mirrorX ( float imageWidth )
{
// 获取待处理点的位置
vec2 currentVec = destCoord();
// 返回最终显示位置
return vec2 ( imageWidth - currentVec.x , currentVec.y );
}
|
新建一个过滤器类,命名为MyFilter,如下:
1
2
3
4
5
6
7
8
9
10
11
12
13
14
15
16
17
18
19
20
21
22
23
24
25
26
27
28
29
30
31
32
33
34
35
36
37
38
39
40
41
42
43
44
45
46
47
48
49
50
51
| #import <CoreImage/CoreImage.h>
@interface MyFilter : CIFilter
@property(nonatomic,strong)CIImage * inputImage;
@end
#import "MyFilter.h"
@interface MyFilter()
@property(nonatomic,strong)CIWarpKernel * kernel;
@end
@implementation MyFilter
- (instancetype)init {
self = [super init];
if (self) {
NSBundle *bundle = [NSBundle bundleForClass: [self class]];
NSURL *kernelURL = [bundle URLForResource:@"a" withExtension:@"cikernel"];
NSError *error;
NSString *kernelCode = [NSString stringWithContentsOfURL:kernelURL
encoding:NSUTF8StringEncoding error:&error];
NSArray *kernels = [CIKernel kernelsWithString:kernelCode];
self.kernel = [kernels objectAtIndex:0];
}
return self;
}
- (CIImage *)outputImage
{
CGFloat inputWidth = self.inputImage.extent.size.width;
CIImage *result = [self.kernel applyWithExtent:self.inputImage.extent roiCallback:^CGRect(int index, CGRect destRect) {
return destRect;
} inputImage:self.inputImage arguments:@[@(inputWidth)]];
return result;
}
-(NSDictionary<NSString *,id> *)attributes{
return @{
@"inputImage" : @{
@"CIAttributeClass" : @"CIImage",
@"CIAttributeDisplayName" : @"Image--",
@"CIAttributeType" : @"CIAttributeTypeImage"
}};
}
@end
|
如下进行使用即可:
1
2
3
4
5
6
| MyFilter * filter = [[MyFilter alloc]init];
filter.inputImage = image2;
CIContext * context = [[CIContext alloc]initWithOptions:nil];
CIImage * output = [filter outputImage];
CGImageRef ref = [context createCGImage:output fromRect:output.extent];
UIImage * newImage = [UIImage imageWithCGImage:ref];
|
二、使用CoreImage实现人脸识别
人脸识别是目前非常热门的一种图像处理技术,CoreImage内置了对人脸进行识别的相关功能接口,并且可以对人脸面部特征进行抓取,下面我们来实现一个简单的实时识别人脸特征的Demo。

首先创建一个视图作为图像扫描视图,如下:
.h文件
1
2
3
|
@interface FaceView : UIView
@end
|
.m文件
1
2
3
4
5
6
7
8
9
10
11
12
13
14
15
16
17
18
19
20
21
22
23
24
25
26
27
28
29
30
31
32
33
34
35
36
37
38
39
40
41
42
43
44
45
46
47
48
49
50
51
52
53
54
55
56
57
58
59
60
61
62
63
64
65
66
67
68
69
70
71
72
73
74
75
76
77
78
79
80
81
82
83
84
85
86
87
88
89
90
91
92
93
94
95
96
97
98
99
100
101
102
103
104
105
106
107
108
109
110
111
112
113
114
115
116
117
118
119
120
121
122
123
124
125
126
127
128
129
130
131
132
133
134
135
136
137
138
139
140
141
142
143
144
145
146
147
148
149
150
151
152
153
154
155
156
157
158
159
160
161
162
163
164
165
166
167
168
169
170
171
172
173
174
175
176
177
178
179
180
181
182
183
184
185
186
187
188
189
190
191
192
193
194
195
196
|
#import "FaceView.h"
#import <AVFoundation/AVFoundation.h>
#import "FaceHandle.h"
#define FACE_SCAN_QUEUE "FACE_SCAN_QUEUE"
@interface FaceView()<AVCaptureVideoDataOutputSampleBufferDelegate>
@property(nonatomic,strong)AVCaptureSession *captureSession;
@property(nonatomic,strong)AVCaptureDeviceInput * captureInput;
@property(nonatomic,strong)AVCaptureVideoDataOutput * captureOutput;
@property(nonnull,strong)AVCaptureVideoPreviewLayer * videoLayer;
@property(nonatomic,strong)dispatch_queue_t queue;
@property(nonatomic,assign)BOOL hasHandle;
@property(nonatomic,strong)UIView * faceView;
@end
@implementation FaceView
#pragma mark - Override
-(instancetype)init{
self = [super init];
if (self) {
[self install];
}
return self;
}
-(instancetype)initWithFrame:(CGRect)frame{
self = [super initWithFrame:frame];
if (self) {
[self install];
}
return self;
}
-(void)layoutSubviews{
[super layoutSubviews];
self.videoLayer.frame = self.bounds;
}
#pragma mark - InnerFunc
-(void)install{
if (![UIImagePickerController isSourceTypeAvailable:UIImagePickerControllerSourceTypeCamera]) {
NSLog(@"不支持");
return;
}
self.queue = dispatch_queue_create(FACE_SCAN_QUEUE, NULL);
[self.captureSession startRunning];
AVAuthorizationStatus status = [AVCaptureDevice authorizationStatusForMediaType:AVMediaTypeVideo];
if (status!=AVAuthorizationStatusAuthorized) {
NSLog(@"需要权限");
return;
}
self.videoLayer = [AVCaptureVideoPreviewLayer layerWithSession:self.captureSession];
self.videoLayer.frame = CGRectZero;
self.videoLayer.videoGravity = AVLayerVideoGravityResizeAspectFill;
[self.layer addSublayer:self.videoLayer];
[self addSubview:self.faceView];
self.faceView.frame = CGRectMake(0, 0, self.frame.size.width, self.frame.size.height);
}
-(void)renderReactWithInfo:(NSDictionary *)info{
for (UIView * v in self.faceView.subviews) {
[v removeFromSuperview];
}
NSArray * faceArray = info[FACE_HANDLE_INFO_FACE_ARRAY];
for (int i = 0;i < faceArray.count; i++) {
NSDictionary * face = faceArray[i];
NSValue * faceValue = face[FACE_HANDLE_INFO_FACE_FRAME];
if (faceValue) {
CGRect faceR = [faceValue CGRectValue];
UIView * faceView = [[UIView alloc]initWithFrame:faceR];
faceView.backgroundColor = [UIColor clearColor];
faceView.layer.borderColor = [UIColor redColor].CGColor;
faceView.layer.borderWidth = 2;
[self.faceView addSubview:faceView];
}
NSValue * leftEye = face[FACE_HANDLE_INFO_FACE_LEFT_EYE_FRAME];
if (leftEye) {
CGRect leftEyeR = [leftEye CGRectValue];
UIView * eye = [[UIView alloc]initWithFrame:leftEyeR];
eye.backgroundColor = [UIColor clearColor];
eye.layer.borderColor = [UIColor greenColor].CGColor;
eye.layer.borderWidth = 2;
[self.faceView addSubview:eye];
}
NSValue * rightEye = face[FACE_HANDLE_INFO_FACE_RIGHT_EYE_FRAME];
if (rightEye) {
CGRect rightEyeR = [rightEye CGRectValue];
UIView * eye = [[UIView alloc]initWithFrame:rightEyeR];
eye.backgroundColor = [UIColor clearColor];
eye.layer.borderColor = [UIColor greenColor].CGColor;
eye.layer.borderWidth = 2;
[self.faceView addSubview:eye];
}
NSValue * mouth = face[FACE_HANDLE_INFO_FACE_MOUTH_FRAME];
if (mouth) {
CGRect mouthR = [mouth CGRectValue];
UIView * mouth = [[UIView alloc]initWithFrame:mouthR];
mouth.backgroundColor = [UIColor clearColor];
mouth.layer.borderColor = [UIColor orangeColor].CGColor;
mouth.layer.borderWidth = 2;
[self.faceView addSubview:mouth];
}
}
}
#pragma AVDelegate
-(void)captureOutput:(AVCaptureOutput *)output didOutputSampleBuffer:(CMSampleBufferRef)sampleBuffer fromConnection:(AVCaptureConnection *)connection{
if (self.hasHandle) {
return;
}
self.hasHandle = YES;
CVImageBufferRef imageBuffer = CMSampleBufferGetImageBuffer(sampleBuffer);
CVPixelBufferLockBaseAddress(imageBuffer,0);
uint8_t *baseAddress = (uint8_t *)CVPixelBufferGetBaseAddress(imageBuffer);
size_t bytesPerRow = CVPixelBufferGetBytesPerRow(imageBuffer);
size_t width = CVPixelBufferGetWidth(imageBuffer);
size_t height = CVPixelBufferGetHeight(imageBuffer);
CGColorSpaceRef colorSpace = CGColorSpaceCreateDeviceRGB();
CGContextRef newContext = CGBitmapContextCreate(baseAddress,width, height, 8, bytesPerRow, colorSpace,kCGBitmapByteOrder32Little | kCGImageAlphaPremultipliedFirst);
CGImageRef newImage = CGBitmapContextCreateImage(newContext);
CGContextRelease(newContext);
CGColorSpaceRelease(colorSpace);
UIImage *image= [UIImage imageWithCGImage:newImage scale:1.0 orientation:UIImageOrientationRight];
CGImageRelease(newImage);
[[FaceHandle sharedInstance] handleImage:image viewSize:self.frame.size completed:^(BOOL success, NSDictionary *info) {
self.hasHandle = NO;
[self renderReactWithInfo:info];
}];
CVPixelBufferUnlockBaseAddress(imageBuffer,0);
}
#pragma mark - setter and getter
-(AVCaptureSession *)captureSession{
if (!_captureSession) {
_captureSession = [[AVCaptureSession alloc]init];
[_captureSession addInput:self.captureInput];
[_captureSession addOutput:self.captureOutput];
}
return _captureSession;
}
-(AVCaptureDeviceInput *)captureInput{
if (!_captureInput) {
_captureInput = [AVCaptureDeviceInput deviceInputWithDevice:[AVCaptureDevice defaultDeviceWithMediaType:AVMediaTypeVideo] error:nil];
}
return _captureInput;
}
-(AVCaptureVideoDataOutput *)captureOutput{
if (!_captureOutput) {
_captureOutput = [[AVCaptureVideoDataOutput alloc]init];
_captureOutput.alwaysDiscardsLateVideoFrames = YES;
[_captureOutput setSampleBufferDelegate:self queue:self.queue];
_captureOutput.videoSettings = @{(__bridge NSString *)kCVPixelBufferPixelFormatTypeKey:@(kCVPixelFormatType_32BGRA)};
}
return _captureOutput;
}
-(UIView *)faceView{
if (!_faceView) {
_faceView = [[UIView alloc]init];
_faceView.backgroundColor = [UIColor clearColor];
}
return _faceView;
}
@end
|
在真机上运行工程,通过摄像头可以将实时的画面捕获到屏幕上,下面实现核心的人脸识别代码:
创建继承于NSObject的FaceHandle类,如下:
.h文件
1
2
3
4
5
6
7
8
9
10
11
12
13
14
15
16
17
| extern const NSString * FACE_HANDLE_INFO_FACE_ARRAY;
extern const NSString * FACE_HANDLE_INFO_FACE_FRAME;
extern const NSString * FACE_HANDLE_INFO_FACE_LEFT_EYE_FRAME;
extern const NSString * FACE_HANDLE_INFO_FACE_RIGHT_EYE_FRAME;
extern const NSString * FACE_HANDLE_INFO_FACE_MOUTH_FRAME;
extern const NSString * FACE_HANDLE_INFO_ERROR;
@interface FaceHandle : NSObject
+(instancetype)sharedInstance;
-(void)handleImage:(UIImage *)image viewSize:(CGSize )viewSize completed:(void(^)(BOOL success,NSDictionary * info))completion;
@end
|
.m文件
1
2
3
4
5
6
7
8
9
10
11
12
13
14
15
16
17
18
19
20
21
22
23
24
25
26
27
28
29
30
31
32
33
34
35
36
37
38
39
40
41
42
43
44
45
46
47
48
49
50
51
52
53
54
55
56
57
58
59
60
61
62
63
64
65
66
67
68
69
70
71
72
73
74
75
76
77
78
79
80
81
82
83
84
85
86
87
88
89
90
91
92
93
94
95
96
97
98
99
100
101
102
103
104
105
106
107
108
109
110
111
112
113
114
115
116
117
118
119
120
121
122
123
124
125
126
127
128
129
130
| #import "FaceHandle.h"
#define FACE_HANDLE_DISPATCH_QUEUE "FACE_HANDLE_DISPATCH_QUEUE"
const NSString * FACE_HANDLE_INFO_FACE_FRAME = @"FACE_HANDLE_INFO_FACE_FRAME";
const NSString * FACE_HANDLE_INFO_FACE_LEFT_EYE_FRAME = @"FACE_HANDLE_INFO_FACE_LEFT_EYE_FRAME";
const NSString * FACE_HANDLE_INFO_FACE_RIGHT_EYE_FRAME = @"FACE_HANDLE_INFO_FACE_RIGHT_EYE_FRAME";
const NSString * FACE_HANDLE_INFO_FACE_MOUTH_FRAME = @"FACE_HANDLE_INFO_FACE_MOUTH_FRAME";
const NSString * FACE_HANDLE_INFO_ERROR = @"FACE_HANDLE_INFO_ERROR";
const NSString * FACE_HANDLE_INFO_FACE_ARRAY = @"FACE_HANDLE_INFO_FACE_ARRAY";
@interface FaceHandle()
@property(nonatomic,strong)dispatch_queue_t workingQueue;
@end
@implementation FaceHandle
+(instancetype)sharedInstance{
static dispatch_once_t onceToken;
static FaceHandle * sharedInstance = nil;
if (!sharedInstance) {
dispatch_once(&onceToken, ^{
sharedInstance = [[FaceHandle alloc] init];
});
}
return sharedInstance;
}
#pragma mark - Override
-(instancetype)init{
self = [super init];
if (self) {
self.workingQueue = dispatch_queue_create(FACE_HANDLE_DISPATCH_QUEUE, NULL);
}
return self;
}
#pragma mark - InnerFunc
-(void)handleImage:(UIImage *)image viewSize:(CGSize )viewSize completed:(void (^)(BOOL , NSDictionary *))completion{
if (!image) {
if (completion) {
completion(NO,@{FACE_HANDLE_INFO_ERROR:@"图片捕获出错"});
}
return;
}
dispatch_async(self.workingQueue, ^{
UIImage * newImage = [self strectImage:image withSize:viewSize];
if (newImage) {
NSArray * faceArray = [self analyseFaceImage:newImage];
if (completion) {
dispatch_async(dispatch_get_main_queue(), ^{
completion(YES,@{FACE_HANDLE_INFO_FACE_ARRAY:faceArray});
});
}
}else{
if (completion) {
dispatch_async(dispatch_get_main_queue(), ^{
completion(NO,@{FACE_HANDLE_INFO_ERROR:@"图片识别出错"});
});
}
}
});
}
-(UIImage *)strectImage:(UIImage *)img withSize:(CGSize)size{
UIGraphicsBeginImageContext(size);
CGRect thumbnailRect = CGRectZero;
thumbnailRect.origin = CGPointMake(0, 0);
thumbnailRect.size.width = size.width;
thumbnailRect.size.height = size.height;
[img drawInRect:thumbnailRect];
UIImage * newImage = UIGraphicsGetImageFromCurrentImageContext();
UIGraphicsEndImageContext();
if (newImage) {
return newImage;
}
return nil;
}
-(NSArray *)analyseFaceImage:(UIImage *)image{
NSMutableArray * dataArray = [NSMutableArray array];
CIImage * cImage = [CIImage imageWithCGImage:image.CGImage];
NSDictionary* opts = [NSDictionary dictionaryWithObject:
CIDetectorAccuracyHigh forKey:CIDetectorAccuracy];
CIDetector* detector = [CIDetector detectorOfType:CIDetectorTypeFace
context:nil options:opts];
NSArray* features = [detector featuresInImage:cImage];
CGSize inputImageSize = [cImage extent].size;
CGAffineTransform transform = CGAffineTransformIdentity;
transform = CGAffineTransformScale(transform, 1, -1);
transform = CGAffineTransformTranslate(transform, 0, -inputImageSize.height);
for (CIFaceFeature *faceFeature in features){
NSMutableDictionary * faceDic = [NSMutableDictionary dictionary];
CGRect faceViewBounds = CGRectApplyAffineTransform(faceFeature.bounds, transform);
[faceDic setValue:[NSValue valueWithCGRect:faceViewBounds] forKey:(NSString *)FACE_HANDLE_INFO_FACE_FRAME];
CGFloat faceWidth = faceFeature.bounds.size.width;
if(faceFeature.hasLeftEyePosition){
CGPoint faceViewLeftPoint = CGPointApplyAffineTransform(faceFeature.leftEyePosition, transform);
CGRect leftEyeBounds = CGRectMake(faceViewLeftPoint.x-faceWidth*0.1, faceViewLeftPoint.y-faceWidth*0.1, faceWidth*0.2, faceWidth*0.2);
[faceDic setValue:[NSValue valueWithCGRect:leftEyeBounds] forKey:(NSString *)FACE_HANDLE_INFO_FACE_LEFT_EYE_FRAME];
}
if(faceFeature.hasRightEyePosition){
CGPoint faceViewRightPoint = CGPointApplyAffineTransform(faceFeature.rightEyePosition, transform);
CGRect rightEyeBounds = CGRectMake(faceViewRightPoint.x-faceWidth*0.1, faceViewRightPoint.y-faceWidth*0.1, faceWidth*0.2, faceWidth*0.2);
[faceDic setValue:[NSValue valueWithCGRect:rightEyeBounds] forKey:(NSString *)FACE_HANDLE_INFO_FACE_RIGHT_EYE_FRAME];
}
if(faceFeature.hasMouthPosition){
CGPoint faceViewMouthPoint = CGPointApplyAffineTransform(faceFeature.mouthPosition, transform);
CGRect mouthBounds = CGRectMake(faceViewMouthPoint.x-faceWidth*0.2, faceViewMouthPoint.y-faceWidth*0.2, faceWidth*0.4, faceWidth*0.4);
[faceDic setValue:[NSValue valueWithCGRect:mouthBounds] forKey:(NSString *)FACE_HANDLE_INFO_FACE_MOUTH_FRAME];
}
[dataArray addObject:faceDic];
}
return [dataArray copy];
}
@end
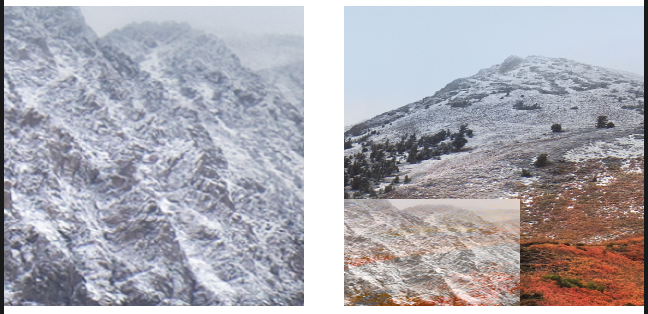
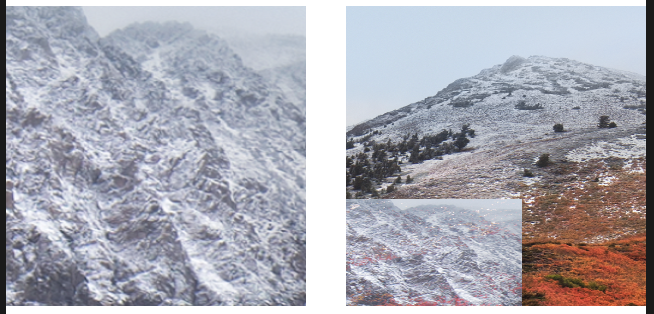
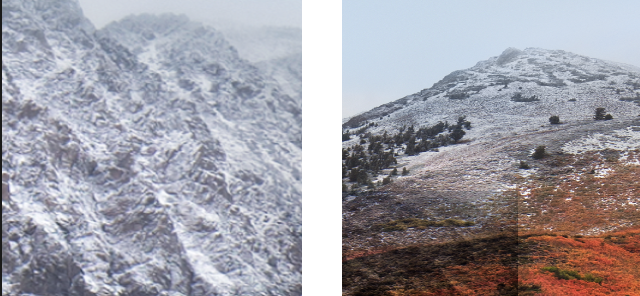
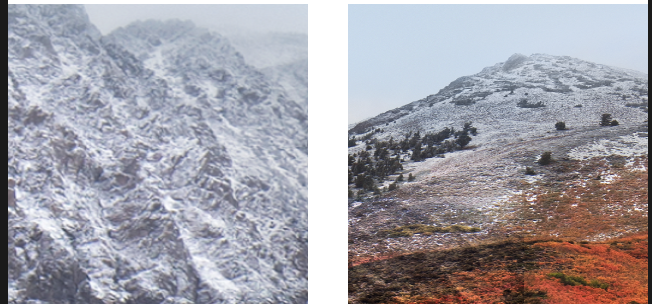
|
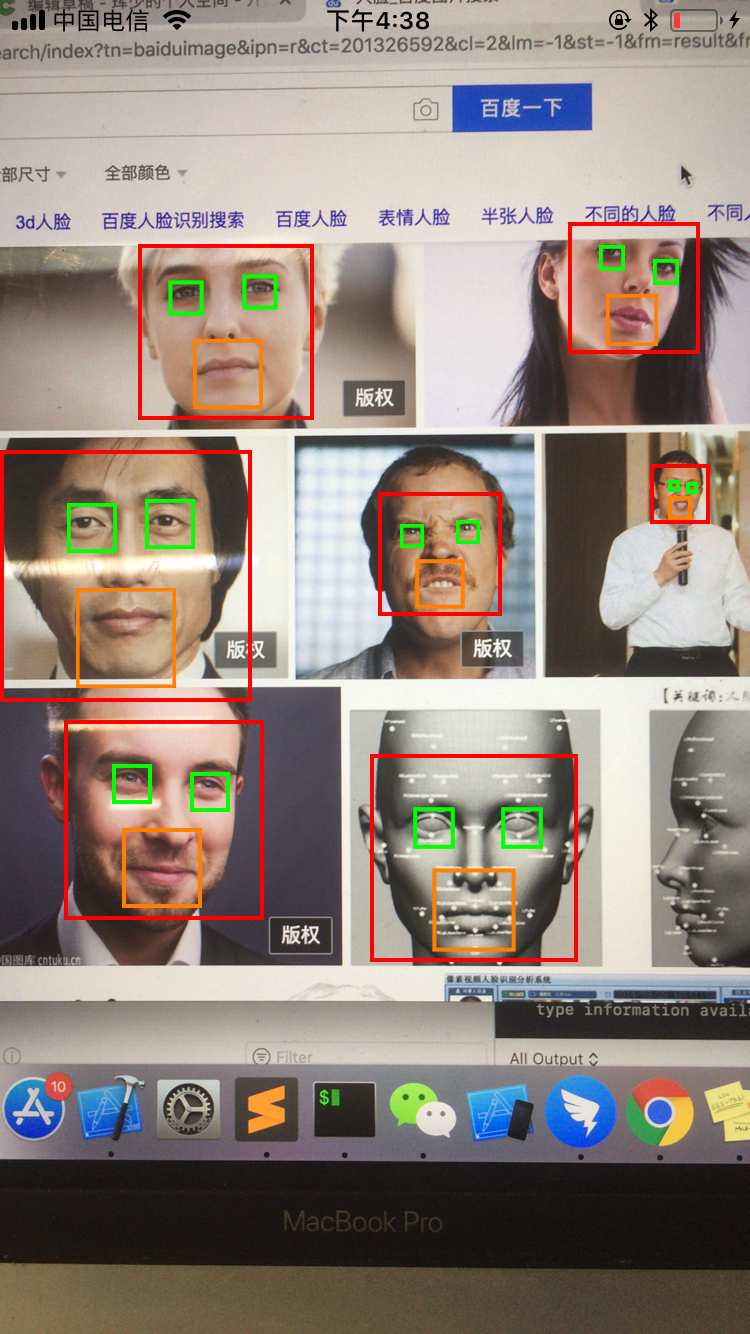
打开百度,随便搜索一些人脸图片进行识别,可以看到识别率还是很高,如下图:
三、CIImage中提供了其他图像识别功能
CIDetector除了可以用来进行人脸识别外,还支持进行二维码、矩形、文字等检测。
矩形区域识别,用来检测图像中的矩形边界,核心代码如下:
1
2
3
4
5
6
7
8
9
10
11
12
13
14
15
16
17
18
19
20
21
22
23
24
25
26
27
28
29
30
| -(NSArray *)analyseRectImage:(UIImage *)image{
NSMutableArray * dataArray = [NSMutableArray array];
CIImage * cImage = [CIImage imageWithCGImage:image.CGImage];
NSDictionary* opts = [NSDictionary dictionaryWithObject:
CIDetectorAccuracyHigh forKey:CIDetectorAccuracy];
CIDetector* detector = [CIDetector detectorOfType:CIDetectorTypeRectangle
context:nil options:opts];
NSArray* features = [detector featuresInImage:cImage];
CGSize inputImageSize = [cImage extent].size;
CGAffineTransform transform = CGAffineTransformIdentity;
transform = CGAffineTransformScale(transform, 1, -1);
transform = CGAffineTransformTranslate(transform, 0, -inputImageSize.height);
for (CIRectangleFeature *feature in features){
NSLog(@"%lu",features.count);
NSMutableDictionary * dic = [NSMutableDictionary dictionary];
CGRect viewBounds = CGRectApplyAffineTransform(feature.bounds, transform);
[dic setValue:[NSValue valueWithCGRect:viewBounds] forKey:@"rectBounds"];
CGPoint topLeft = CGPointApplyAffineTransform(feature.topLeft, transform);
[dic setValue:[NSValue valueWithCGPoint:topLeft] forKey:@"topLeft"];
CGPoint topRight = CGPointApplyAffineTransform(feature.topRight, transform);
[dic setValue:[NSValue valueWithCGPoint:topRight] forKey:@"topRight"];
CGPoint bottomLeft = CGPointApplyAffineTransform(feature.bottomLeft, transform);
[dic setValue:[NSValue valueWithCGPoint:bottomLeft] forKey:@"bottomLeft"];
CGPoint bottomRight = CGPointApplyAffineTransform(feature.bottomRight, transform);
[dic setValue:[NSValue valueWithCGPoint:bottomRight] forKey:@"bottomRight"];
[dataArray addObject:dic];
}
return [dataArray copy];
}
|
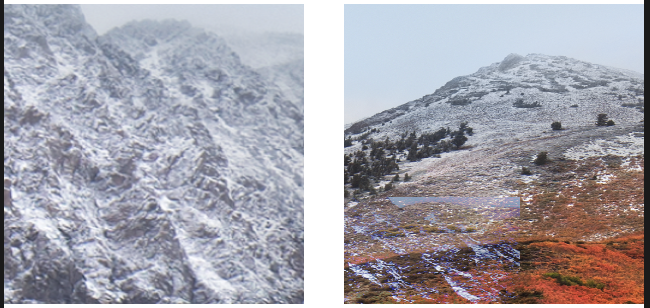
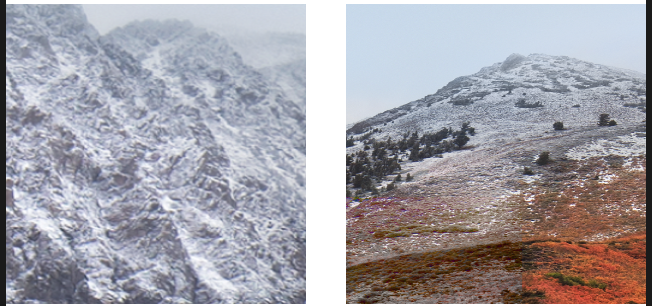
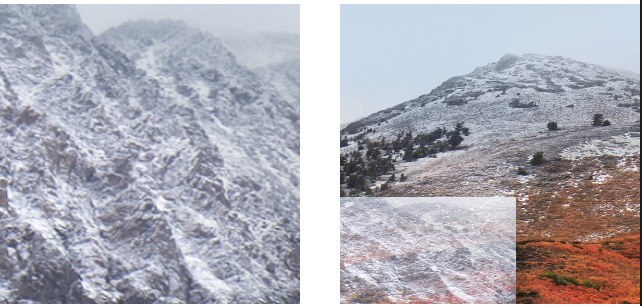
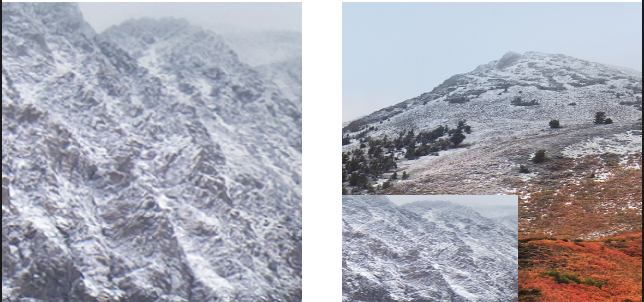
效果如下图所示:
二维码扫描不仅可以分析出图片中的二维码位置,还可以解析出二维码数据,核心代码如下:
1
2
3
4
5
6
7
8
9
10
11
12
13
14
15
16
17
18
19
20
21
22
23
24
25
26
27
28
29
30
| -(NSArray *)analyseQRImage:(UIImage *)image{
NSMutableArray * dataArray = [NSMutableArray array];
CIImage * cImage = [CIImage imageWithCGImage:image.CGImage];
NSDictionary* opts = [NSDictionary dictionaryWithObject:
CIDetectorAccuracyHigh forKey:CIDetectorAccuracy];
CIDetector* detector = [CIDetector detectorOfType:CIDetectorTypeQRCode
context:nil options:opts];
NSArray* features = [detector featuresInImage:cImage];
CGSize inputImageSize = [cImage extent].size;
CGAffineTransform transform = CGAffineTransformIdentity;
transform = CGAffineTransformScale(transform, 1, -1);
transform = CGAffineTransformTranslate(transform, 0, -inputImageSize.height);
for (CIQRCodeFeature *feature in features){
NSMutableDictionary * dic = [NSMutableDictionary dictionary];
CGRect viewBounds = CGRectApplyAffineTransform(feature.bounds, transform);
[dic setValue:[NSValue valueWithCGRect:viewBounds] forKey:@"rectBounds"];
CGPoint topLeft = CGPointApplyAffineTransform(feature.topLeft, transform);
[dic setValue:[NSValue valueWithCGPoint:topLeft] forKey:@"topLeft"];
CGPoint topRight = CGPointApplyAffineTransform(feature.topRight, transform);
[dic setValue:[NSValue valueWithCGPoint:topRight] forKey:@"topRight"];
CGPoint bottomLeft = CGPointApplyAffineTransform(feature.bottomLeft, transform);
[dic setValue:[NSValue valueWithCGPoint:bottomLeft] forKey:@"bottomLeft"];
CGPoint bottomRight = CGPointApplyAffineTransform(feature.bottomRight, transform);
[dic setValue:[NSValue valueWithCGPoint:bottomRight] forKey:@"bottomRight"];
[dic setValue:feature.messageString forKey:@"content"];
[dataArray addObject:dic];
}
return [dataArray copy];
}
|
CIImage框架中还支持对文本区域进行分析,核心代码如下:
1
2
3
4
5
6
7
8
9
10
11
12
13
14
15
16
17
18
19
20
21
22
23
24
25
26
27
28
29
30
31
| -(NSArray *)analyseTextImage:(UIImage *)image{
NSMutableArray * dataArray = [NSMutableArray array];
CIImage * cImage = [CIImage imageWithCGImage:image.CGImage];
NSDictionary* opts = [NSDictionary dictionaryWithObject:
CIDetectorAccuracyHigh forKey:CIDetectorAccuracy];
CIDetector* detector = [CIDetector detectorOfType:CIDetectorTypeText
context:nil options:nil];
NSArray* features = [detector featuresInImage:cImage options:@{CIDetectorReturnSubFeatures:@YES}];
CGSize inputImageSize = [cImage extent].size;
CGAffineTransform transform = CGAffineTransformIdentity;
transform = CGAffineTransformScale(transform, 1, -1);
transform = CGAffineTransformTranslate(transform, 0, -inputImageSize.height);
for (CITextFeature *feature in features){
NSLog(@"%@",feature.subFeatures);
NSMutableDictionary * dic = [NSMutableDictionary dictionary];
CGRect viewBounds = CGRectApplyAffineTransform(feature.bounds, transform);
[dic setValue:[NSValue valueWithCGRect:viewBounds] forKey:@"rectBounds"];
CGPoint topLeft = CGPointApplyAffineTransform(feature.topLeft, transform);
[dic setValue:[NSValue valueWithCGPoint:topLeft] forKey:@"topLeft"];
CGPoint topRight = CGPointApplyAffineTransform(feature.topRight, transform);
[dic setValue:[NSValue valueWithCGPoint:topRight] forKey:@"topRight"];
CGPoint bottomLeft = CGPointApplyAffineTransform(feature.bottomLeft, transform);
[dic setValue:[NSValue valueWithCGPoint:bottomLeft] forKey:@"bottomLeft"];
CGPoint bottomRight = CGPointApplyAffineTransform(feature.bottomRight, transform);
[dic setValue:[NSValue valueWithCGPoint:bottomRight] forKey:@"bottomRight"];
[dataArray addObject:dic];
}
return [dataArray copy];
}
|
效果如下图所示:

四、CoreImage中的相关核心类
1.CIColor类
CIColor类是CoreImage中描述色彩的类。
1
2
3
4
5
6
7
8
9
10
11
12
13
14
15
16
17
18
19
20
21
22
23
24
25
26
27
28
29
30
31
32
33
34
35
36
37
|
+ (instancetype)colorWithCGColor:(CGColorRef)c;
+ (instancetype)colorWithRed:(CGFloat)r green:(CGFloat)g blue:(CGFloat)b alpha:(CGFloat)a;
+ (instancetype)colorWithRed:(CGFloat)r green:(CGFloat)g blue:(CGFloat)b;
+ (nullable instancetype)colorWithRed:(CGFloat)r green:(CGFloat)g blue:(CGFloat)b alpha:(CGFloat)a colorSpace:(CGColorSpaceRef)colorSpace;
+ (nullable instancetype)colorWithRed:(CGFloat)r green:(CGFloat)g blue:(CGFloat)b colorSpace:(CGColorSpaceRef)colorSpace;
- (instancetype)initWithCGColor:(CGColorRef)c;
+ (instancetype)colorWithString:(NSString *)representation;
- (instancetype)initWithRed:(CGFloat)r green:(CGFloat)g blue:(CGFloat)b alpha:(CGFloat)a;
- (instancetype)initWithRed:(CGFloat)r green:(CGFloat)g blue:(CGFloat)b;
- (nullable instancetype)initWithRed:(CGFloat)r green:(CGFloat)g blue:(CGFloat)b alpha:(CGFloat)a colorSpace:(CGColorSpaceRef)colorSpace;
- (nullable instancetype)initWithRed:(CGFloat)r green:(CGFloat)g blue:(CGFloat)b colorSpace:(CGColorSpaceRef)colorSpace;
@property (readonly) size_t numberOfComponents;
@property (readonly) const CGFloat *components;
@property (readonly) CGFloat alpha;
@property (readonly) CGColorSpaceRef colorSpace;
@property (readonly) CGFloat red;
@property (readonly) CGFloat green;
@property (readonly) CGFloat blue;
@property (class, strong, readonly) CIColor *blackColor ;
@property (class, strong, readonly) CIColor *whiteColor ;
@property (class, strong, readonly) CIColor *grayColor ;
@property (class, strong, readonly) CIColor *redColor ;
@property (class, strong, readonly) CIColor *greenColor ;
@property (class, strong, readonly) CIColor *blueColor ;
@property (class, strong, readonly) CIColor *cyanColor ;
@property (class, strong, readonly) CIColor *magentaColor ;
@property (class, strong, readonly) CIColor *yellowColor ;
@property (class, strong, readonly) CIColor *clearColor
|
2.CIImage类
CIImage是CoreImage中最核心的类,它描述了图像对象。
1
2
3
4
5
6
7
8
9
10
11
12
13
14
15
16
17
18
19
20
21
22
23
24
25
26
27
28
29
30
31
32
33
34
35
36
37
38
39
40
41
42
43
44
45
46
47
48
49
50
51
52
53
54
55
56
57
58
59
60
61
62
63
64
65
66
67
68
69
70
71
72
73
74
75
76
77
78
79
80
81
82
83
84
85
86
87
88
89
90
91
92
93
94
95
96
97
98
99
100
101
102
103
104
105
106
107
108
109
110
111
112
113
114
115
116
117
118
|
+ (CIImage *)imageWithCGImage:(CGImageRef)image;
+ (CIImage *)imageWithCGImage:(CGImageRef)image
options:(nullable NSDictionary<CIImageOption, id> *)options;
+ (CIImage *)imageWithCGLayer:(CGLayerRef)layer NS_DEPRECATED_MAC(10_4,10_11);
+ (CIImage *)imageWithCGLayer:(CGLayerRef)layer
options:(nullable NSDictionary<CIImageOption, id> *)options;
+ (CIImage *)imageWithBitmapData:(NSData *)data
bytesPerRow:(size_t)bytesPerRow
size:(CGSize)size
format:(CIFormat)format
colorSpace:(nullable CGColorSpaceRef)colorSpace;
+ (CIImage *)imageWithTexture:(unsigned int)name
size:(CGSize)size
flipped:(BOOL)flipped
colorSpace:(nullable CGColorSpaceRef)colorSpace;
+ (CIImage *)imageWithTexture:(unsigned int)name
size:(CGSize)size
flipped:(BOOL)flipped
options:(nullable NSDictionary<CIImageOption, id> *)options;
+ (nullable CIImage *)imageWithMTLTexture:(id<MTLTexture>)texture
options:(nullable NSDictionary<CIImageOption, id> *)options;
+ (nullable CIImage *)imageWithContentsOfURL:(NSURL *)url;
+ (nullable CIImage *)imageWithContentsOfURL:(NSURL *)url
options:(nullable NSDictionary<CIImageOption, id> *)options;
+ (nullable CIImage *)imageWithData:(NSData *)data;
+ (nullable CIImage *)imageWithData:(NSData *)data
options:(nullable NSDictionary<CIImageOption, id> *)options;
+ (CIImage *)imageWithCVImageBuffer:(CVImageBufferRef)imageBuffer;
+ (CIImage *)imageWithCVImageBuffer:(CVImageBufferRef)imageBuffer
options:(nullable NSDictionary<CIImageOption, id> *)options;
+ (CIImage *)imageWithCVPixelBuffer:(CVPixelBufferRef)pixelBuffer;
+ (CIImage *)imageWithCVPixelBuffer:(CVPixelBufferRef)pixelBuffer
options:(nullable NSDictionary<CIImageOption, id> *)options;
+ (CIImage *)imageWithColor:(CIColor *)color;
+ (CIImage *)emptyImage;
- (instancetype)initWithCGImage:(CGImageRef)image;
- (instancetype)initWithCGImage:(CGImageRef)image
options:(nullable NSDictionary<CIImageOption, id> *)options;
- (instancetype)initWithCGLayer:(CGLayerRef)layer);
- (instancetype)initWithCGLayer:(CGLayerRef)layer;
- (instancetype)initWithBitmapData:(NSData *)data
bytesPerRow:(size_t)bytesPerRow
size:(CGSize)size
format:(CIFormat)format
colorSpace:(nullable CGColorSpaceRef)colorSpace;
- (instancetype)initWithTexture:(unsigned int)name
size:(CGSize)size
flipped:(BOOL)flipped
colorSpace:(nullable CGColorSpaceRef)colorSpace;
- (instancetype)initWithTexture:(unsigned int)name
size:(CGSize)size
flipped:(BOOL)flipped
options:(nullable NSDictionary<CIImageOption, id> *)options;
- (nullable instancetype)initWithMTLTexture:(id<MTLTexture>)texture
options:(nullable NSDictionary<CIImageOption, id> *)options;
- (nullable instancetype)initWithContentsOfURL:(NSURL *)url;
- (nullable instancetype)initWithContentsOfURL:(NSURL *)url
options:(nullable NSDictionary<CIImageOption, id> *)options;
- (instancetype)initWithCVImageBuffer:(CVImageBufferRef)imageBuffer;
- (instancetype)initWithCVImageBuffer:(CVImageBufferRef)imageBuffer
options:(nullable NSDictionary<CIImageOption, id> *)options;
- (instancetype)initWithCVPixelBuffer:(CVPixelBufferRef)pixelBuffer;
- (instancetype)initWithCVPixelBuffer:(CVPixelBufferRef)pixelBuffer
options:(nullable NSDictionary<CIImageOption, id> *)options;
- (instancetype)initWithColor:(CIColor *)color;
- (CIImage *)imageByApplyingTransform:(CGAffineTransform)matrix;
- (CIImage *)imageByApplyingOrientation:(int)orientation;
- (CIImage *)imageByApplyingCGOrientation:(CGImagePropertyOrientation)orientation;
- (CGAffineTransform)imageTransformForOrientation:(int)orientation;
- (CGAffineTransform)imageTransformForCGOrientation:(CGImagePropertyOrientation)orientation;
- (CIImage *)imageByCompositingOverImage:(CIImage *)dest;
- (CIImage *)imageByCroppingToRect:(CGRect)rect;
- (CIImage *)imageByClampingToExtent;
- (CIImage *)imageByClampingToRect:(CGRect)rect;
- (CIImage *)imageByApplyingFilter:(NSString *)filterName
withInputParameters:(nullable NSDictionary<NSString *,id> *)params;
- (CIImage *)imageByApplyingFilter:(NSString *)filterName;
@property (NS_NONATOMIC_IOSONLY, readonly) CGRect extent;
@property (atomic, readonly) NSDictionary<NSString *,id> *properties;
@property (atomic, readonly, nullable) NSURL *url;
@property (atomic, readonly, nullable) CGColorSpaceRef colorSpace;
@property (nonatomic, readonly, nullable) CGImageRef CGImage;
|
3.CIContext类
CIContext是CoreImage中的上下文对象,用来进行图片的渲染,已经转换为其他框架的图像对象。
1
2
3
4
5
6
7
8
9
10
11
12
13
14
15
16
17
18
19
20
21
22
23
24
25
26
27
28
29
30
31
32
33
34
35
36
37
38
39
40
41
42
43
44
45
46
47
48
49
50
51
52
53
54
55
56
57
58
59
60
61
62
63
64
65
66
67
68
69
70
71
72
73
74
75
76
77
78
79
80
81
82
83
84
85
86
87
88
89
90
91
92
93
94
95
96
97
98
99
100
101
102
103
104
105
106
107
108
109
110
111
112
113
114
115
116
|
+ (CIContext *)contextWithCGContext:(CGContextRef)cgctx
options:(nullable NSDictionary<CIContextOption, id> *)options;
+ (CIContext *)contextWithOptions:(nullable NSDictionary<CIContextOption, id> *)options;
+ (CIContext *)context;
- (instancetype)initWithOptions:(nullable NSDictionary<CIContextOption, id> *)options;
+ (CIContext *)contextWithMTLDevice:(id<MTLDevice>)device;
+ (CIContext *)contextWithMTLDevice:(id<MTLDevice>)device
options:(nullable NSDictionary<CIContextOption, id> *)options;
@property (nullable, nonatomic, readonly) CGColorSpaceRef workingColorSpace;
@property (nonatomic, readonly) CIFormat workingFormat;
- (void)drawImage:(CIImage *)image
atPoint:(CGPoint)atPoint
fromRect:(CGRect)fromRect;
- (void)drawImage:(CIImage *)image
inRect:(CGRect)inRect
fromRect:(CGRect)fromRect;
- (nullable CGImageRef)createCGImage:(CIImage *)image;
fromRect:(CGRect)fromRect;
- (nullable CGImageRef)createCGImage:(CIImage *)image
fromRect:(CGRect)fromRect
format:(CIFormat)format
colorSpace:(nullable CGColorSpaceRef)colorSpace;
- (nullable CGLayerRef)createCGLayerWithSize:(CGSize)size
info:(nullable CFDictionaryRef)info;
- (void)render:(CIImage *)image
toBitmap:(void *)data
rowBytes:(ptrdiff_t)rowBytes
bounds:(CGRect)bounds
format:(CIFormat)format;
- (void)render:(CIImage *)image
toCVPixelBuffer:(CVPixelBufferRef)buffer
colorSpace:(nullable CGColorSpaceRef)colorSpace;
- (void)render:(CIImage *)image
toCVPixelBuffer:(CVPixelBufferRef)buffer
bounds:(CGRect)bounds
colorSpace:(nullable CGColorSpaceRef)colorSpace;
- (void)render:(CIImage *)image
toMTLTexture:(id<MTLTexture>)texture
commandBuffer:(nullable id<MTLCommandBuffer>)commandBuffer
bounds:(CGRect)bounds
colorSpace:(CGColorSpaceRef)colorSpace;
- (void)clearCaches;
- (CGSize)inputImageMaximumSize;
- (CGSize)outputImageMaximumSize;
- (nullable NSData*) TIFFRepresentationOfImage:(CIImage*)image
format:(CIFormat)format
colorSpace:(CGColorSpaceRef)colorSpace
options:(NSDictionary<CIImageRepresentationOption, id>*)options;
- (nullable NSData*) JPEGRepresentationOfImage:(CIImage*)image
colorSpace:(CGColorSpaceRef)colorSpace
options:(NSDictionary<CIImageRepresentationOption, id>*)options;
- (nullable NSData*) HEIFRepresentationOfImage:(CIImage*)image
format:(CIFormat)format
colorSpace:(CGColorSpaceRef)colorSpace
options:(NSDictionary<CIImageRepresentationOption, id>*)options;
- (nullable NSData*) PNGRepresentationOfImage:(CIImage*)image
format:(CIFormat)format
colorSpace:(CGColorSpaceRef)colorSpace
options:(NSDictionary<CIImageRepresentationOption, id>*)options;
- (BOOL) writeTIFFRepresentationOfImage:(CIImage*)image
toURL:(NSURL*)url
format:(CIFormat)format
colorSpace:(CGColorSpaceRef)colorSpace
options:(NSDictionary<CIImageRepresentationOption, id>*)options
error:(NSError **)errorPtr;
- (BOOL) writePNGRepresentationOfImage:(CIImage*)image
toURL:(NSURL*)url
format:(CIFormat)format
colorSpace:(CGColorSpaceRef)colorSpace
options:(NSDictionary<CIImageRepresentationOption, id>*)options
error:(NSError **)errorPtr;
- (BOOL) writeJPEGRepresentationOfImage:(CIImage*)image
toURL:(NSURL*)url
colorSpace:(CGColorSpaceRef)colorSpace
options:(NSDictionary<CIImageRepresentationOption, id>*)options
error:(NSError **)errorPtr;
- (BOOL) writeHEIFRepresentationOfImage:(CIImage*)image
toURL:(NSURL*)url
format:(CIFormat)format
colorSpace:(CGColorSpaceRef)colorSpace
options:(NSDictionary<CIImageRepresentationOption, id>*)options
error:(NSError **)errorPtr;
|
4.CIDetector类
前面有过CIDetector类的功能演示,这是CIImage框架中非常强大的一个类,使用它可以进行复杂的图片识别技术,解析如下:
1
2
3
4
5
6
7
8
9
10
11
12
13
14
15
16
17
18
19
20
21
22
23
24
25
26
27
28
29
|
+ (nullable CIDetector *)detectorOfType:(NSString*)type
context:(nullable CIContext *)context
options:(nullable NSDictionary<NSString *,id> *)options;
- (NSArray<CIFeature *> *)featuresInImage:(CIImage *)image;
- (NSArray<CIFeature *> *)featuresInImage:(CIImage *)image
options:(nullable NSDictionary<NSString *,id> *)options;
|
5.CIFeature相关类
CIFeature与其相关子类定义了特征数据模型。
1
2
3
4
5
6
7
8
9
10
11
12
13
14
15
16
17
18
19
20
21
22
23
24
25
26
27
28
29
30
31
32
33
34
35
36
37
38
39
40
41
42
43
44
45
46
47
48
49
50
51
52
53
54
55
56
57
58
59
60
61
62
63
64
65
66
67
68
69
70
71
72
73
74
75
76
77
78
79
80
81
82
83
84
| @interface CIFeature : NSObject {}
@property (readonly, retain) NSString *type;
@property (readonly, assign) CGRect bounds;
@end
@interface CIFaceFeature : CIFeature
@property (readonly, assign) CGRect bounds;
@property (readonly, assign) BOOL hasLeftEyePosition;
@property (readonly, assign) CGPoint leftEyePosition;
@property (readonly, assign) BOOL hasRightEyePosition;
@property (readonly, assign) CGPoint rightEyePosition;
@property (readonly, assign) BOOL hasMouthPosition;
@property (readonly, assign) CGPoint mouthPosition;
@property (readonly, assign) BOOL hasTrackingID;
@property (readonly, assign) int trackingID;
@property (readonly, assign) BOOL hasTrackingFrameCount;
@property (readonly, assign) int trackingFrameCount;
@property (readonly, assign) BOOL hasFaceAngle;
@property (readonly, assign) float faceAngle;
@property (readonly, assign) BOOL hasSmile;
@property (readonly, assign) BOOL leftEyeClosed;
@property (readonly, assign) BOOL rightEyeClosed;
@end
@interface CIRectangleFeature : CIFeature
@property (readonly) CGRect bounds;
@property (readonly) CGPoint topLeft;
@property (readonly) CGPoint topRight;
@property (readonly) CGPoint bottomLeft;
@property (readonly) CGPoint bottomRight;
@end
@interface CIQRCodeFeature : CIFeature
@property (readonly) CGRect bounds;
@property (readonly) CGPoint topLeft;
@property (readonly) CGPoint topRight;
@property (readonly) CGPoint bottomLeft;
@property (readonly) CGPoint bottomRight;
@property (nullable, readonly) NSString* messageString;
@property (nullable, readonly) CIQRCodeDescriptor *symbolDescriptor NS_AVAILABLE(10_13, 11_0);
@end
@interface CITextFeature : CIFeature
@property (readonly) CGRect bounds;
@property (readonly) CGPoint topLeft;
@property (readonly) CGPoint topRight;
@property (readonly) CGPoint bottomLeft;
@property (readonly) CGPoint bottomRight;
@property (nullable, readonly) NSArray *subFeatures;
@end
|
热爱技术,热爱生活,写代码,交朋友 珲少 QQ:316045346